This tutorial supposes that you have followed the Tutorial: How to create and build a project that uses ViSP and CMake on Unix or Windows.
Introduction
In this tutorial you will learn how to use ViSP filtering functions implemented in vpImageFilter class.
Note that all the material (source code and images) described in this tutorial is part of ViSP source code (in tutorial/image folder) and could be found in https://github.com/lagadic/visp/tree/master/tutorial/image.
Let us consider the following source code that comes from tutorial-image-filter.cpp.
#include <visp3/core/vpConfig.h>
#include <visp3/core/vpImageFilter.h>
#include <visp3/gui/vpDisplayD3D.h>
#include <visp3/gui/vpDisplayGDI.h>
#include <visp3/gui/vpDisplayGTK.h>
#include <visp3/gui/vpDisplayOpenCV.h>
#include <visp3/gui/vpDisplayX.h>
#include <visp3/io/vpImageIo.h>
#ifdef ENABLE_VISP_NAMESPACE
#endif
{
#if defined(VISP_HAVE_X11)
vpDisplayX d(I);
#elif defined(HAVE_OPENCV_HIGHGUI)
#elif defined(VISP_HAVE_GTK)
#elif defined(VISP_HAVE_GDI)
#elif defined(VISP_HAVE_D3D9)
#else
std::cout << "No image viewer is available..." << std::endl;
#endif
}
{
display(I, title);
}
int main(int argc, char **argv)
{
try {
if (argc != 2) {
printf("Usage: %s <image name.[pgm,ppm,jpeg,png,bmp]>\n", argv[0]);
return EXIT_FAILURE;
}
try {
}
catch (...) {
std::cout << "Cannot read image \"" << argv[1] << "\"" << std::endl;
return EXIT_FAILURE;
}
display(I, "Original image");
display(F, "Blur (default)");
display(F, "Blur (var=2)");
display(dIx, "Gradient dIx");
display(dIy, "Gradient dIy");
display(C, "Canny");
K[0][0] = 1;
K[0][1] = 0;
K[0][2] = -1;
K[1][0] = 2;
K[1][1] = 0;
K[1][2] = -2;
K[2][0] = 1;
K[2][1] = 0;
K[2][2] = -1;
display(Gx, "Sobel x");
size_t nlevel = 3;
std::vector<vpImage<unsigned char> > pyr(nlevel);
pyr[0] = I;
for (size_t i = 1; i < nlevel; i++) {
display(pyr[i], "Pyramid");
}
return EXIT_SUCCESS;
}
std::cout << "Catch an exception: " << e << std::endl;
return EXIT_FAILURE;
}
}
Display for windows using Direct3D 3rd party. Thus to enable this class Direct3D should be installed....
Display for windows using GDI (available on any windows 32 platform).
The vpDisplayGTK allows to display image using the GTK 3rd party library. Thus to enable this class G...
The vpDisplayOpenCV allows to display image using the OpenCV library. Thus to enable this class OpenC...
static bool getClick(const vpImage< unsigned char > &I, bool blocking=true)
static void display(const vpImage< unsigned char > &I)
static void setTitle(const vpImage< unsigned char > &I, const std::string &windowtitle)
static void flush(const vpImage< unsigned char > &I)
static void displayText(const vpImage< unsigned char > &I, const vpImagePoint &ip, const std::string &s, const vpColor &color)
error that can be emitted by ViSP classes.
static void convert(const vpImage< unsigned char > &src, vpImage< vpRGBa > &dest)
static void canny(const vpImage< unsigned char > &I, vpImage< unsigned char > &Ic, const unsigned int &gaussianFilterSize, const float &thresholdCanny, const unsigned int &apertureSobel)
static void getGradX(const vpImage< unsigned char > &I, vpImage< FilterType > &dIx, const vpImage< bool > *p_mask=nullptr)
static void gaussianBlur(const vpImage< ImageType > &I, vpImage< FilterType > &GI, unsigned int size=7, FilterType sigma=0., bool normalize=true, const vpImage< bool > *p_mask=nullptr)
static void filter(const vpImage< ImageType > &I, vpImage< FilterType > &If, const vpArray2D< FilterType > &M, bool convolve=false, const vpImage< bool > *p_mask=nullptr)
static void getGradY(const vpImage< unsigned char > &I, vpImage< FilterType > &dIy, const vpImage< bool > *p_mask=nullptr)
static void getGaussPyramidal(const vpImage< unsigned char > &I, vpImage< unsigned char > &GI)
static void read(vpImage< unsigned char > &I, const std::string &filename, int backend=IO_DEFAULT_BACKEND)
Implementation of a matrix and operations on matrices.
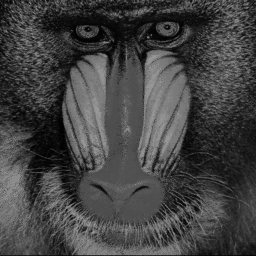
Once build, you should have tutorial-image-filter binary. It shows how to apply different filters on an input image. Here we will consider monkey.pgm as input image.
To see the resulting filtered images, just run:
./tutorial-image-filter monkey.pgm
The following sections give a line by line explanation of the source code dedicated to image filtering capabilities.
Gaussian blur
Monkey input image is read from disk and is stored in I which is a gray level image declared as
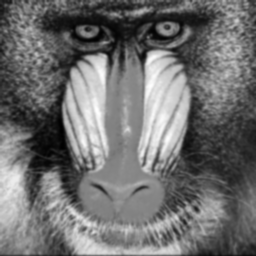
To apply a Gaussian blur to this image we first have to declare a resulting floating-point image F. Then the blurred image could be obtained using the default Gaussian filter:
The resulting image is the following:
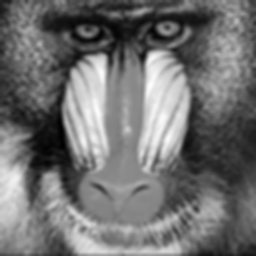
It is also possible to specify the Gaussian filter kernel size and the Gaussian standard deviation (sigma) using:
We thus obtain the following image:
Gradients computation
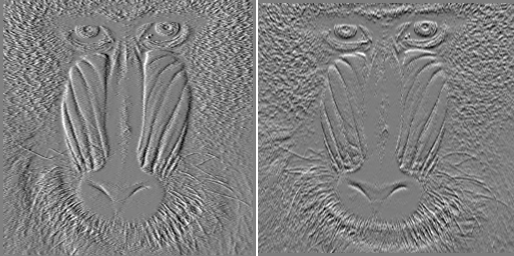
To compute the gradients or the spatial derivative along X use:
Gradients along Y could be obtained using:
The resulting floating-point images dIx, dIy are the following:
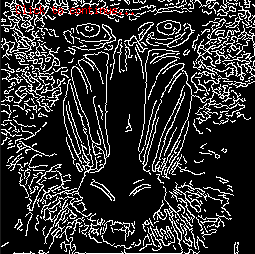
Canny edge detector
Canny edge detector function relies on OpenCV if ViSP was build with OpenCV 2.1 or higher. Otherwise, it relies on the ViSP implementation in vpCannyEdgeDetector class.
After the declaration of a new image container C, Canny edge detector is applied using:
Where:
- 5: is the size of the Gaussian kernel used to blur the image before applying the Canny edge detector.
- -1.: is the upper threshold set in the program. Setting it to a negative value asks ViSP to compute automatically the lower and upper thresholds. Otherwise, the lower threshold is set to be equal to one third of the upper threshold, following Canny’s recommendation.
- 3: is the size of the Sobel kernel used internally.
The resulting image C is the following:
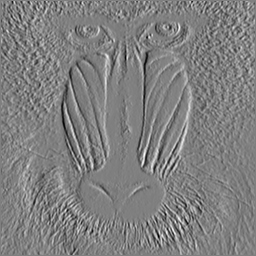
Convolution
To apply a convolution to an image, we first have to define a kernel. For example, let us consider the 3x3 Sobel kernel defined in K.
![\[ {\bf K} = \left[ \begin{matrix} 1 & 0 & -1 \\ 2 & 0 & -2 \\ 1 & 0 & -1 \\ \end{matrix} \right] \]](form_1529.png)
K[0][0] = 1;
K[0][1] = 0;
K[0][2] = -1;
K[1][0] = 2;
K[1][1] = 0;
K[1][2] = -2;
K[2][0] = 1;
K[2][1] = 0;
K[2][2] = -1;
After the declaration of a new floating-point image Gx, the convolution is obtained using:
The content of the filtered image Gx is the following.
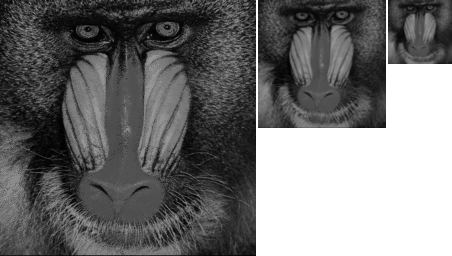
Gaussian image pyramid
To construct a pyramid of Gaussian filtered images as a vector of images implemented in pyr[] you may use:
size_t nlevel = 3;
std::vector<vpImage<unsigned char> > pyr(nlevel);
pyr[0] = I;
for (size_t i = 1; i < nlevel; i++) {
display(pyr[i], "Pyramid");
}
The content of pyr[0], pyr[1], pyr[2] is the following:
Next tutorial
You are now ready to see the next Tutorial: Blob tracking.