|
Visual Servoing Platform
version 3.6.1 under development (2025-02-27)
|
|
Visual Servoing Platform
version 3.6.1 under development (2025-02-27)
|
This tutorial explains how to do a position-based visual-servoing with the Panda 7-dof robot from Franka Emika equipped with an Intel Realsense D435 camera.
The following video shows the resulting robot trajectory when the robot is achieving a position-based visual servoing over an Apriltag target.
We suppose here that you have:
In order to control your robot using libfranka, the controller program on the workstation PC must run with real-time priority under a PREEMPT_RT kernel. This tutorial shows how to proceed to install a real-time kernel.
In our case, we are using Ubuntu 20.04.5 LTS with the real-time kernel version 5.15.70-rt50 x86_64. The following instructions are to install 5.15.70-rt50.
Identify your kernel version
5.15.0 kernel: $ uname -mrs Linux 5.15.0-48-generic x86_64
Choose and download a kernel version and the real-time patch
$ mkdir $VISP_WS/3rdparty
$ cd $VISP_WS/3rdparty
$ mkdir rt-linux; cd rt-linux
$ $ curl -SLO https://www.kernel.org/pub/linux/kernel/v5.x/linux-5.15.70.tar.gz
$ curl -SLO https://www.kernel.org/pub/linux/kernel/projects/rt/5.15/patch-5.15.70-rt50.patch.gz
$ tar xvzf linux-5.15.70.tar.gz
$ gunzip patch-5.15.70-rt50.patch.gz
$ cd linux-5.15.70
$ patch -p1 < ../patch-5.15.70-rt50.patch
Configure and build the kernel
$ sudo apt-get install build-essential bc curl ca-certificates fakeroot gnupg2 libssl-dev lsb-release libelf-dev bison flex
$ make oldconfig
Preemption Model
  1. No Forced Preemption (Server) (PREEMPT_NONE)
  2. Voluntary Kernel Preemption (Desktop) (PREEMPT_VOLUNTARY)
  3. Preemptible Kernel (Low-Latency Desktop) (PREEMPT)
> 4. Fully Preemptible Kernel (Real-Time) (PREEMPT_RT) (NEW)
We recommend keeping all options at their default values.
$ fakeroot make -j4 deb-pkg
make[4]: *** No rule to make target 'debian/canonical-certs.pem', needed by 'certs/x509_certificate_list'. Stop.The solution is to modify
.config replacing the line CONFIG_SYSTEM_TRUSTED_KEYS="debian/canonical-certs.pem" CONFIG_SYSTEM_REVOCATION_KEYS="debian/canonical-revoked-certs.pem" CONFIG_DEBUG_INFO_BTF=ywith
CONFIG_SYSTEM_TRUSTED_KEYS=""
CONFIG_SYSTEM_REVOCATION_KEYS=""
CONFIG_DEBUG_INFO_BTF=n
and then try a new build
$ fakeroot make -j4 deb-pkg
headers and images packages without the dbg suffix. To install: $ sudo dpkg -i ../linux-headers-5.15.70-rt50*.deb ../linux-image-5.15.70-rt50*.deb
$ sudo reboot
5.15.70-rt50 $ uname -msr Linux 5.15.70-rt50 x86_64
Allow a user to set real-time permissions for its processes
PREEMPT_RT kernel is installed and running, add a group named realtime and add the user controlling your robot to this group: $ sudo addgroup realtime $ sudo usermod -a -G realtime $(whoami)
/etc/security/limits.conf: @realtime soft rtprio 99 @realtime soft priority 99 @realtime soft memlock 102400 @realtime hard rtprio 99 @realtime hard priority 99 @realtime hard memlock 102400The limits will be applied after you log out and in again.
As described here, to install the Franka library, follow the steps:
$ sudo apt install build-essential cmake git libpoco-dev libeigen3-dev
$ cd $VISP_WS/3rdparty
$ git clone --recursive https://github.com/frankaemika/libfranka
$ cd libfranka
$ mkdir build
$ cd build
$ cmake .. -DCMAKE_BUILD_TYPE=Release
$ make -j4
$ sudo make install
Following the tutorial, we recall the main steps here:
librealsense build: $ sudo apt-get install git libssl-dev libusb-1.0-0-dev pkg-config libgtk-3-dev cmake-curses-gui $ sudo apt-get install libglfw3-dev libgl1-mesa-dev libglu1-mesa-dev
librealsense from github: $ cd $VISP_WS/3rdparty $ git clone https://github.com/IntelRealSense/librealsense.git $ cd librealsense
librealsense root directory: $ sudo ./scripts/setup_udev_rules.sh
$ mkdir build
$ cd build
$ cmake .. -DBUILD_EXAMPLES=ON -DCMAKE_BUILD_TYPE=Release
$ make -j4
$ sudo make install
$ ./examples/capture/rs-capture
If you are able to visualize the images, it means that you succeed in librealsense installation.
We provide a ready to print 36h11 tag that is 12 by 12 cm square [download] that you may print.
If you are interested to get other tags, follow the steps described in Print an AprilTag marker.
Follow the steps described in Tutorial: Camera eye-to-hand extrinsic calibration in order to estimate the end-effector to camera transformation. This step is mandatory to control the robot in cartesian in the camera frame.
Since you installed new libfranka and librealsense 3rd parties, you need to configure again ViSP with cmake in order that ViSP is able to use these libraries. To this end follow 4.3. Configure ViSP from source. At this step you should see new USE_FRANKA and USE_LIBREALSENSE2 cmake vars appearing in the CMake GUI.
Now follow the instructions for 4.4. Build ViSP libraries.
Our robot controller has by default IP 192.168.1.1. Here we show how to configure a laptop that is connected with an Ethernet cable to the robot controller.
Edit Ethernet connections:
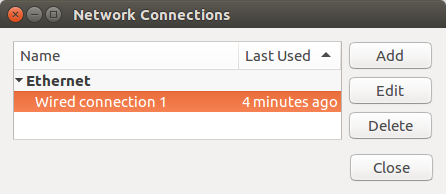
Add a new connexion using "Add" button. Choose the default Ethernet connection type:
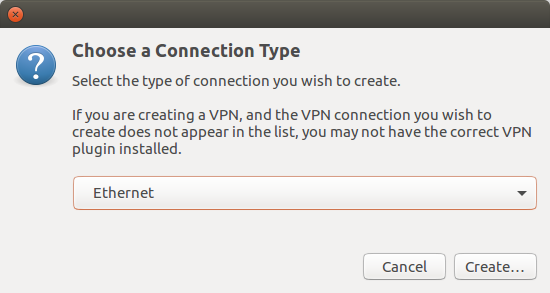
Click "Create" button in order to create a new Franka controller connection that has a static IPv4 like 192.168.1.10 and netmask 255.255.255.0:
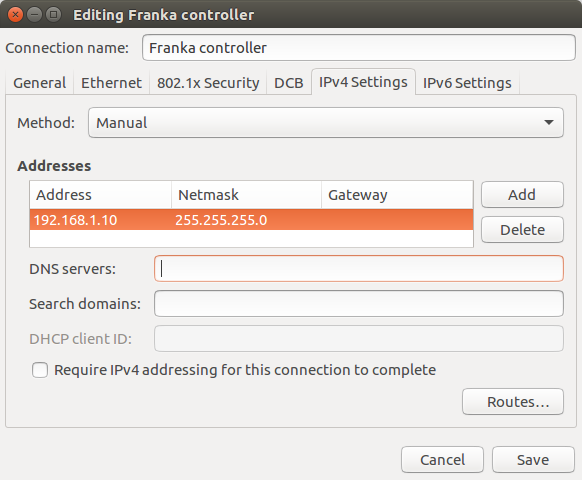
Click "Save" button.
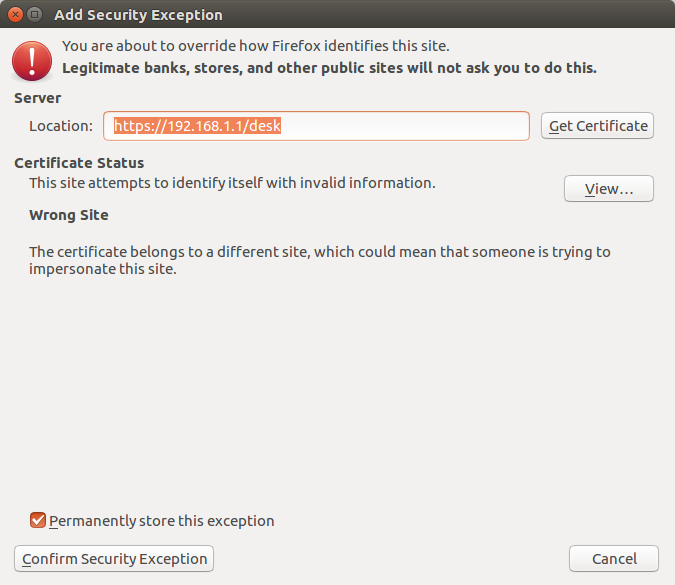
Select the new Ethernet Networks connection named "Franka controller". When the connection is established open a web browser like Firefox or Chromium and enter the address https://192.168.1.1/desk. The first time you will be warned that the connection is not secure. Click "Advanced" and "Add Exception":
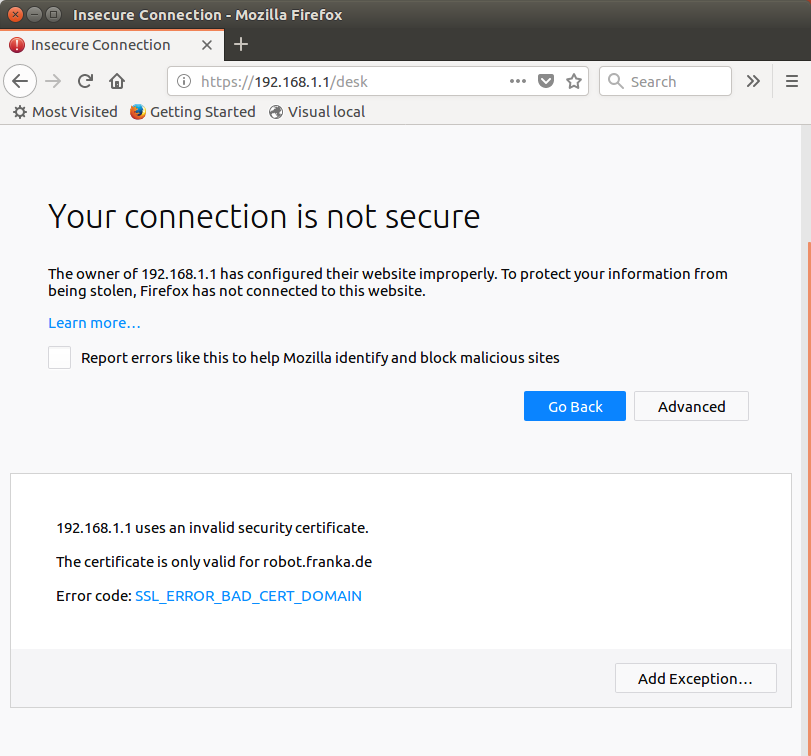
Then confirm security exception
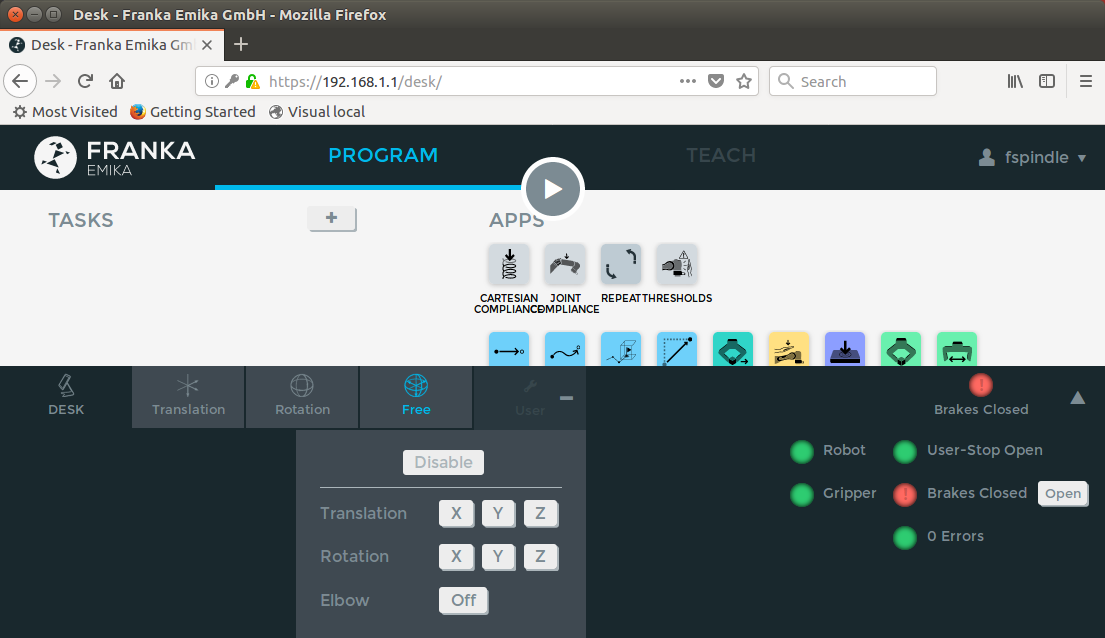
When connected, you may release the user-stop button and open brakes:
An example of position-based visual servoing using Panda robot equipped with a Realsense camera is available in servoFrankaPBVS.cpp.
 the homogeneous transformation between robot end-effector and camera frame. We suppose here that the file is located in
 apps/calibration/eMc.yaml.Now enter in example/servo-franka folder and run servoFrankaPBVS binary using --eMc to locate the file containing the transformation. Other options are available. Using --help show them:
$ cd example/servo-franka
$ ./servoFrankaPBVS --help
./servoFrankaPBVS [--ip <default 192.168.1.1>] [--tag-size <marker size in meter; default 0.12>] [--eMc <eMc extrinsic file>] [--quad-decimate <decimation; default 2>] [--adpative-gain] [--plot] [--task-sequencing] [--no-convergence-threshold] [--verbose] [--help] [-h]
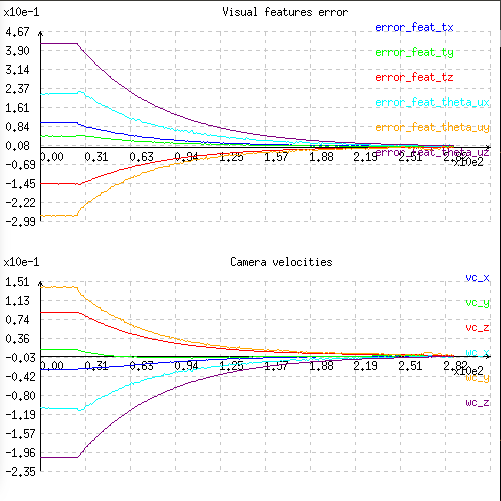
Run the binary activating the plot and using a constant gain:
$ ./servoFrankaPBVS --eMc ../../apps/calibration/eMc.yaml --plot
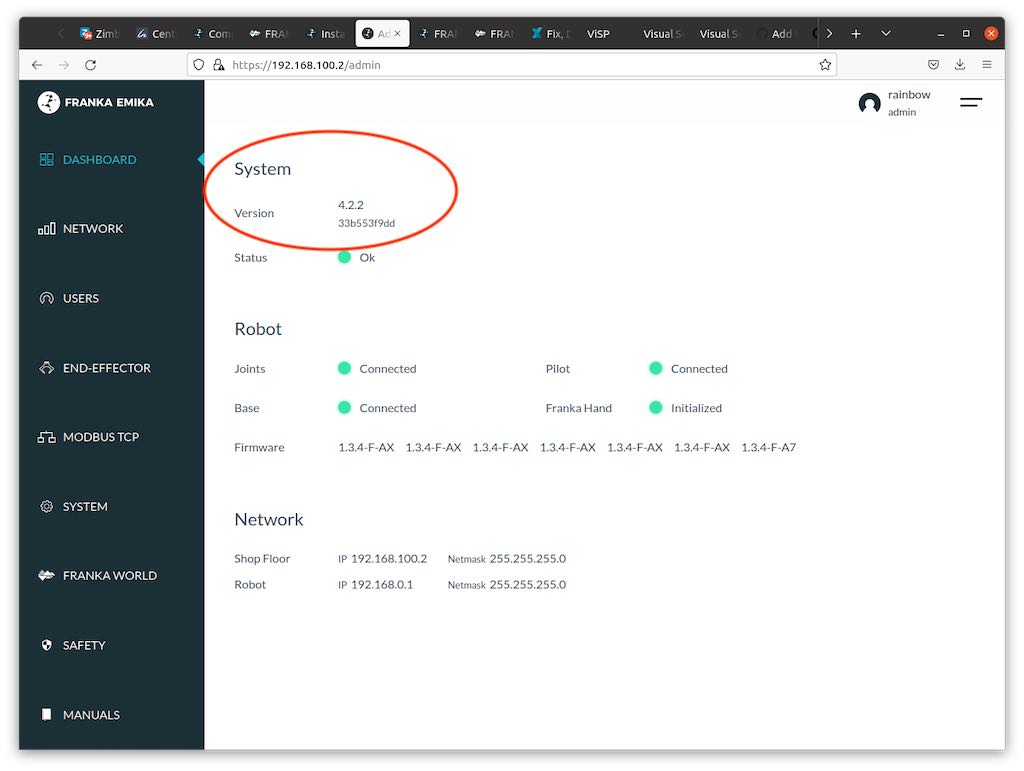
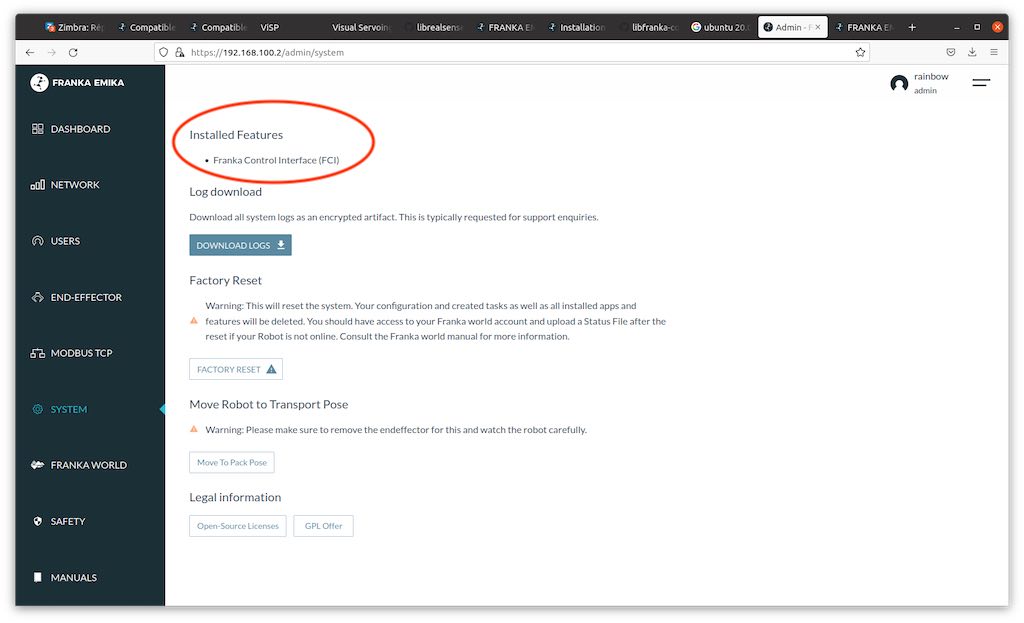
$ ./servoFrankaPBVS
Franka network exception: libfranka: Connection to FCI refused. Please install FCI feature or enable FCI mode in Desk.
you need to use your navigator to activate FCI. This new security feature was introduced in Franka system between version 4.0.2 and 4.2.2. See known issue: libfranka: Connection to FCI refused.
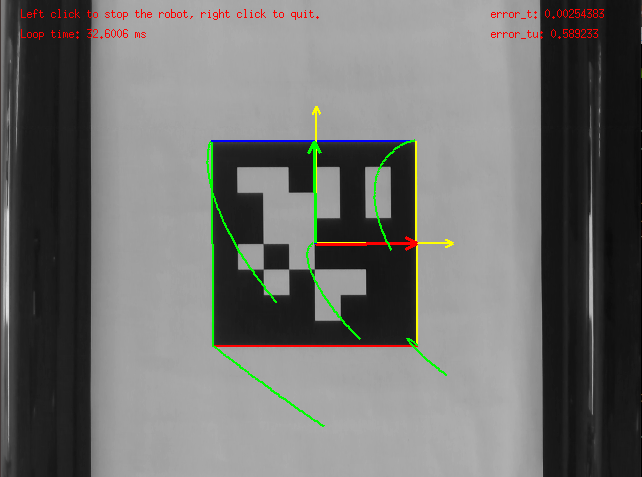
Now you should see new window that shows the image from the camera like in the next image. In this window, use the left mouse click to enable the robot controller, and the right click to quit the binary.

You can also activate an adaptive gain that will make the convergence faster:
$ ./servoFrankaPBVS --eMc ../../apps/calibration/eMc.yaml --plot --adpative-gain
You can also start the robot with a zero velocity at the beginning introducing task sequencing option:
$ ./servoFrankaPBVS --eMc ../../apps/calibration/eMc.yaml --plot --task-sequencing
And finally you can activate the adaptive gain and task sequencing:
$ ./servoFrankaPBVS --eMc ../../apps/calibration/eMc.yaml --plot --adpative-gain --task-sequencing
To learn more about adaptive gain and task sequencing see Tutorial: How to boost your visual servo control law.
When executing one of the binaries that use libfranka you may encounter the following error like:
$ ./servoFrankaIBVS --ip 192.168.100.2
Franka network exception: libfranka: Connection to FCI refused. Please install FCI feature or enable FCI mode in Desk.
Check if you are connected to the Franka robot or if you specified the right IP using --ip command line option set by default to 192.168.1.1.
This error occurred with our robot after upgrading the Franka system from 4.0.2 to 4.2.2 version.
To overcome this error, you need:
"Activate FCI" in the Desk right column (1). It will open the popup (2) that should remain present all the time you want to execute any binary that needs to communicate with the robot using libfranka. 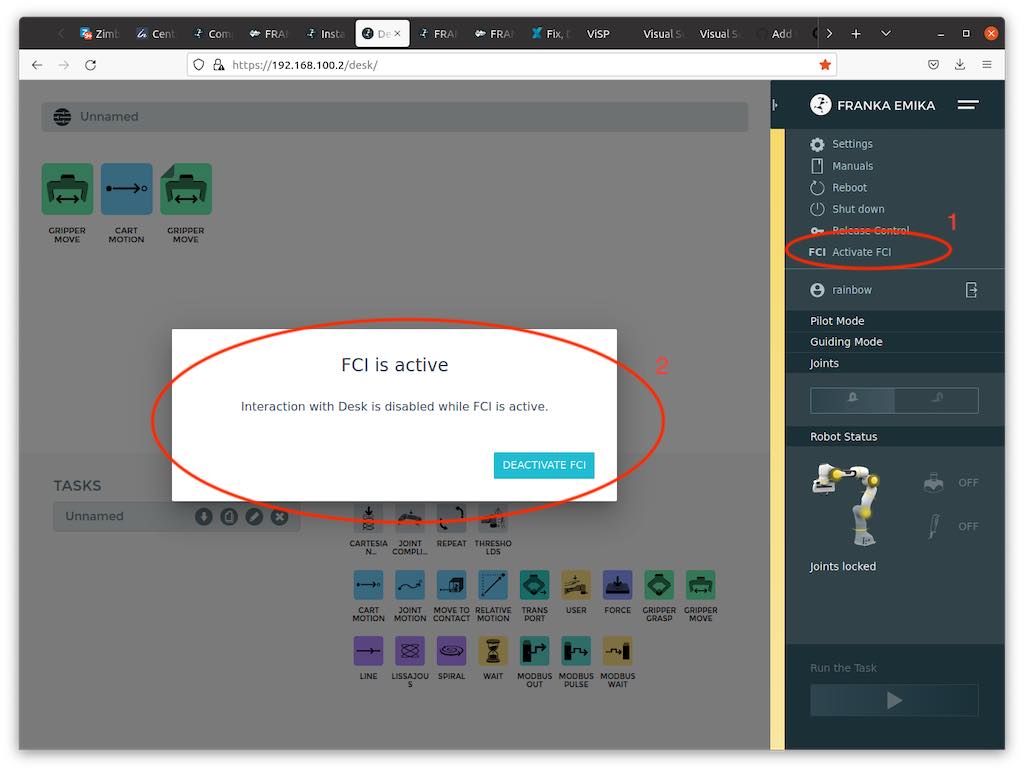
You can continue with the Tutorial: IBVS with Panda 7-dof robot from Franka Emika that shows how to implement an image-based visual servoing scheme with the Franka robot or follow Tutorial: Image-based visual servo that will give some hints on image-based visual servoing in simulation with a free flying camera.
If you want to achieve a physical simulation of a Franka robot, with a model that has been accurately identified from a real Franka robot, like in the next video, we recommend to make a tour on Tutorial: FrankaSim a Panda 7-dof robot from Franka Emika simulator that is available in visp_ros. Here you will find a ROS package that allows to implement position, velocity and impedance control of a simulated Franka robot using ROS and CoppeliaSim.