 |
Visual Servoing Platform
version 3.6.1 under development (2024-05-03)
|
 |
Visual Servoing Platform
version 3.6.1 under development (2024-05-03)
|
This tutorial follows Tutorial: Tracking with MegaPose and details how to export your 3D model for usage with MegaPose. We will use Blender to inspect our model, correct it and export it to a format readable by MegaPose. Blender is free and open source software. It is available for Linux, Windows and Mac and is available here. The steps followed and the displayed images are those for Blender 3.4.1.
This tutorial does not focus on creating the 3D model by hand, but rather on the export specifics for the model to best work with MegaPose. We also provide a step by step guide on how to create a 3D model from images of the object with Neural Radiance Fields (NeRFs).
MegaPose supports multiple file formats: .ply, .obj (with .mtl and textures), .gltf, .glb, .egg, .bam.
Let us now see how to prepare the 3D model and view it in Blender. If you do not have a 3D model of your object and wish to scan it look at the next section. If you already have your model, you can directly go to Importing the model in blender.
Neural Radiance Fields are a way to implicitly represent a 3D scene. At their core, NeRFs learn a function (parametrized by a neural network) that maps a 3D ray to an RGB color (radiance) and a density (space occupancy). Framing the problem of rendering in this way allows to take into account factors such as lighting variations (speculars, reflections). While NeRFs are able to generate high quality renderings, we will focus on their ability to capture a dense representation of the scene geometry, as well as texture object texture.
In this tutorial, we will use nerfstudio to train a NeRF and recover the geometry.
Note that while NeRF may not be entirely accurate (both in geometry and texture), we found in our tests that the generated 3D mesh often works well to get an estimate of an object's pose with MegaPose.
Since NeRFs are based on deep learning, they require a GPU to be trainable. To install nerfstudio you have two options:
If you choose to install with conda, you should create a new environment in order to avoid potential dependency clashes with your other work.
To set up nerfstudio, please follow the installation procedure described here: https://docs.nerf.studio/en/latest/quickstart/installation.html
To train a NeRF and obtain a 3D mesh, we require images of the object.
Nerfstudio supports multiple data acquisition pipelines. You can for instance acquire images on your phone with an application such as KIRI Engine, and feed its results to nerfstudio. For more information, see the available custom data formats.
In this tutorial, we will focus on using a basic image sequence, a folder containing a set of .png images. To capture those images, you can use a program such as the ViSP grabber tutorial for your camera: Tutorial: Image frame grabbing.
For example, to capture images with a Realsense:
The --record 1, will record only the images when you click: you should avoid providing blurry or irrelevant images. It is recommended to have at least 50 images of your object, acquired at various viewpoints for a NeRF to be trainable.
Once you have acquired your images, you need to estimate the camera pose associated to each image. NerfStudio provides some utils to do this. This data processing script is backed by either colmap or hloc. As such, either one of those needs to be installed. For colmap installation instructions, see The nerfstudio documentation. Note that colmap can also provide dense reconstructions, but also requires a GPU.
To process the data, to give it as an input to the NeRF model, run:
Here, we use superpoint as the keypoint extraction method. This method requires hloc to be installed.
Where the full path to the config.yml will change, depending on the date at which you train your model. Other export methods are available, see the documentation on ns-export.
You can specify many parameters that will directly impact the quality of the model:
Excluding image acquisition and installation, this process takes around 40 minutes with a Quadro RTX 6000.
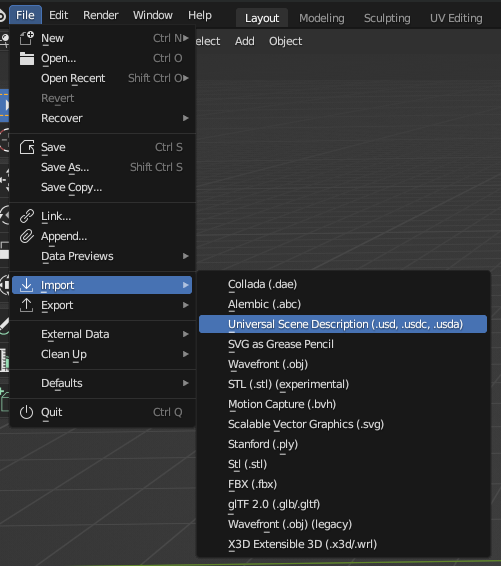
Once you have your model, you should import it into Blender to verify/fix several things.
To import your model:
If you have a textured object, make sure that the texture was imported and is visible in Blender. To do so, switch the viewport rendering to shaded mode.

If you generated your model with a NeRF, it may contain extraneous geometry, corresponding to the environment in which you performed your scan. You should remove this geometry, leaving only the object of interest in the mesh.
Your imported mesh may look like this:
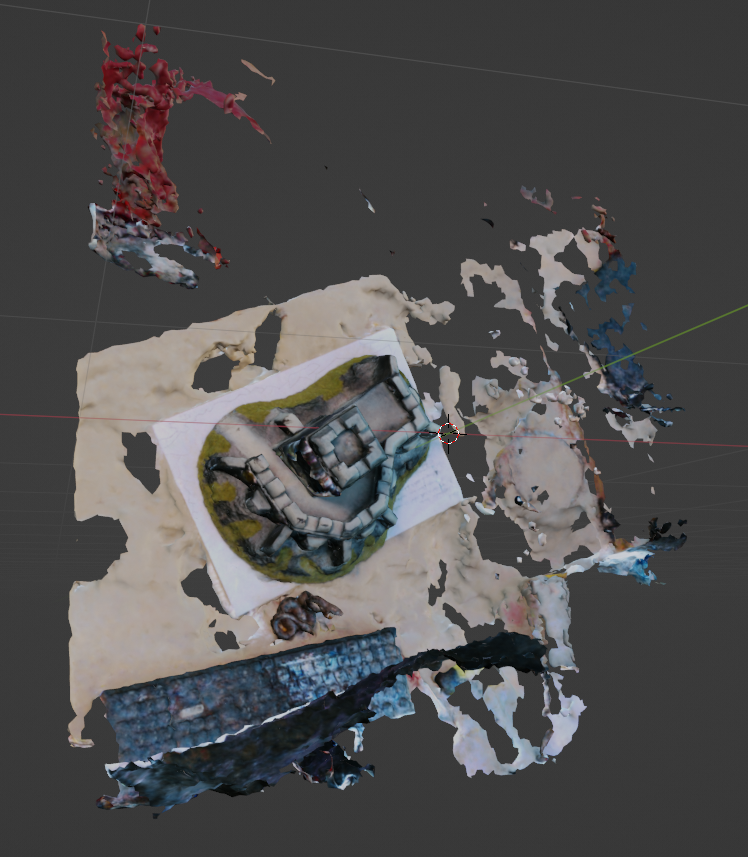
To start, you should realign your mesh with the world frame. This makes it easier to move around and manipulate the mesh. To manipulate your mesh cleanly, you should be in object mode, you can check that it is the case in the top left of the viewport. To rotate your mesh, press R. To restrict the rotation to a single axis, you can press X, Y or Z after pressing R. To move your mesh, press G. The axis restriction principle is the same as for rotation. For a more accurate placement and orientation, use the front, top and side orthographic views. You can do so by using the numbers of the NumPad, or by using the gimbal in the top right of the viewport.
To clean your mesh, select it (left click) and go into edit mode by pressing Tab. You should see the vertices that compose the mesh. Next, press W to have the "paint selection" tool enabled. You can now select the different vertices by dragging your mouse across the mesh. Select all the unwanted geometry, then press X and select the appropriate option (by default, use delete vertices).
To make the process easier and less error prone, delete the geometry in multiple steps. If, by mistake, you clear your selection, you can recover by using CTRL+Z.
If you go into wireframe view, the selection tool will pick up all vertices, whether they are occluded by other faces or not. This makes it faster to delete large portions of geometry.
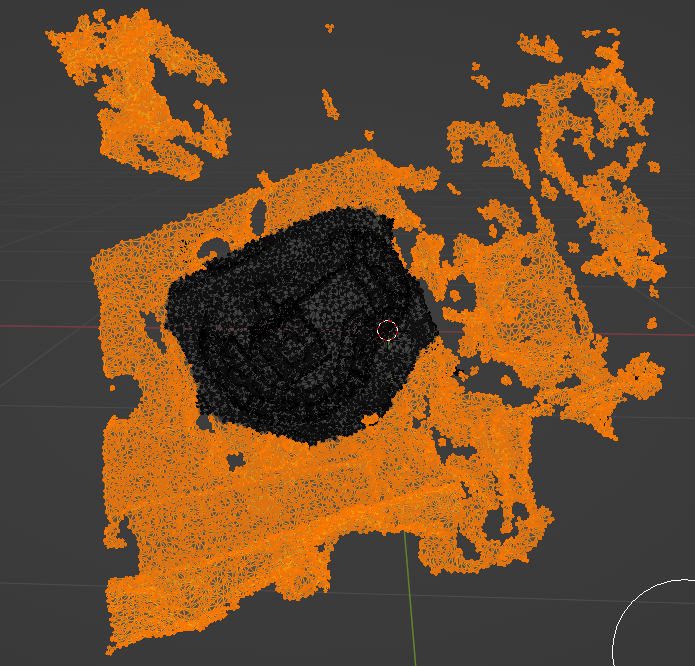
Once you have cleaned up your model, you should have something similar to this:
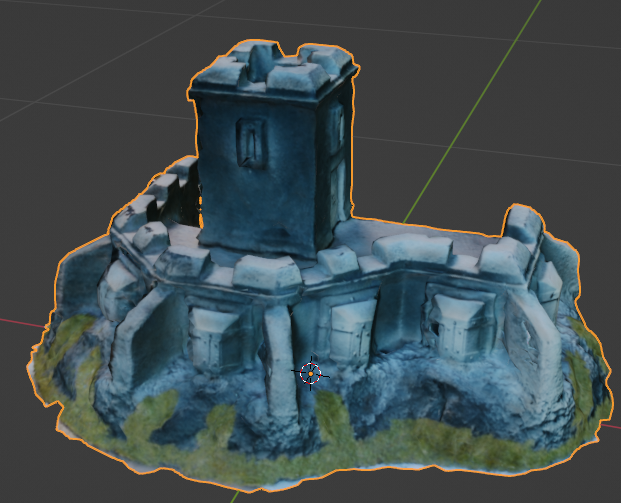
If your model was built from a NeRF or was created with another software, you should ensure that the dimensions of the object are correct. The MegaPose server expects a mesh with units in meters. Some formats and software use millimeters by default.
If you used a NeRF to generate your model and you only used RGB images as inputs, then the scale information will probably be wrong.
To check the scale of your object, you can view the item scale in the "Item panel" in the top right corner of the viewport. To open this panel, press N.
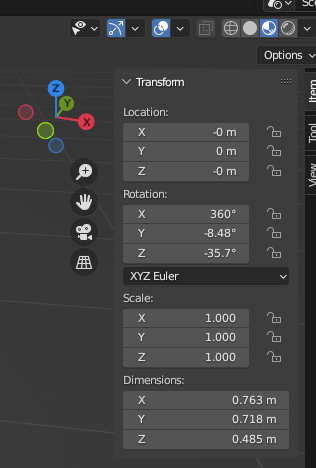
At the bottom of this panel, you can see the dimensions of your model. In the example above, our model is not 77cm wide, so we need to correct it. The easiest way to find the scale of your object is to take measurements. In Blender, you can do so by selecting the ruler tool:

It is also advisable to use vertex snapping to make measuring easier. Snapping can be enabled at the top of the viewport:

Note that you can select on what to snap: vertices, edges or faces.
To measure, click on the starting point and drag until you reach the endpoint of your measurement. Rotate around the model to ensure that the ruler is well placed.
On our model, this is what it looks like:
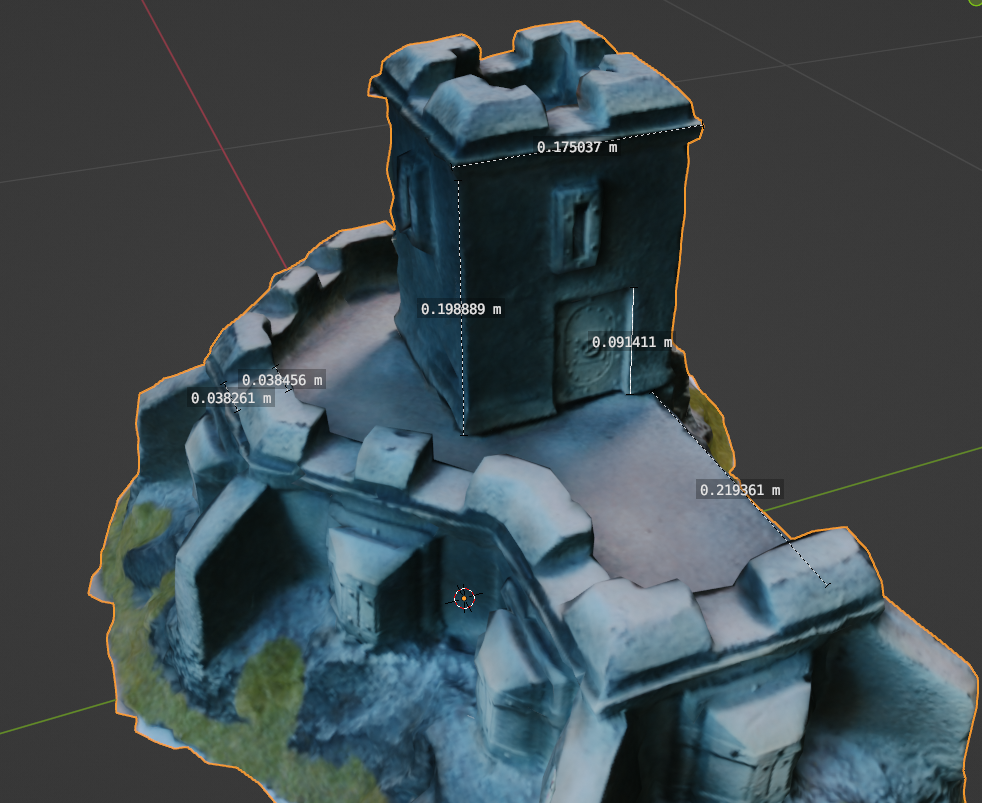
Next, compare the measurements with the real ones to compute a rescaling factor (divid the true measurements by the ones in blender).
To scale, the model, first ensure that it is selected by left clicking on it. Then, you can either:
When exporting to a format such as .obj or .ply, the object origin defined in Blender (the orange dot visible when you select your model) is lost. What matters then is to place your object relative to Blender's world frame, at the axes intersections, at (0,0,0).
To set the origin of the object, move it around with G, or use the "Location" field in the "Item" panel.
Here is an example of a model that is not well placed: it is too far from the world origin. The results may be impacted and the returned poses will not be useful.

Placing the model correctly, here is what we obtain:

First, switch the rendering engine to Cycles in the editor panel (by default, on the right side of the Blender window):
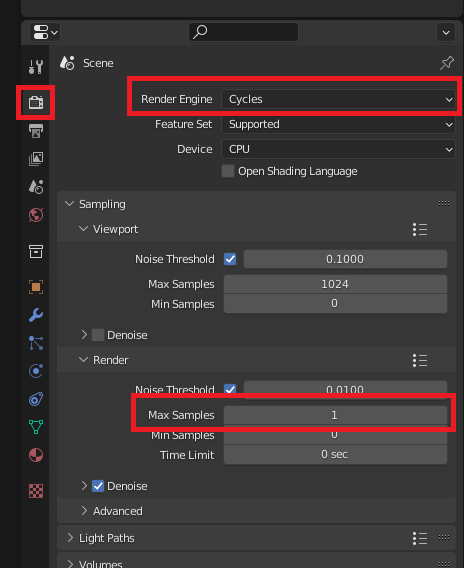
Then, Select your object and open the "Vertex attributes" panel to add a color attribute. When pressing plus, click OK and leave the default options untouched.

Finally, to bake the material in the object data: follow these steps:
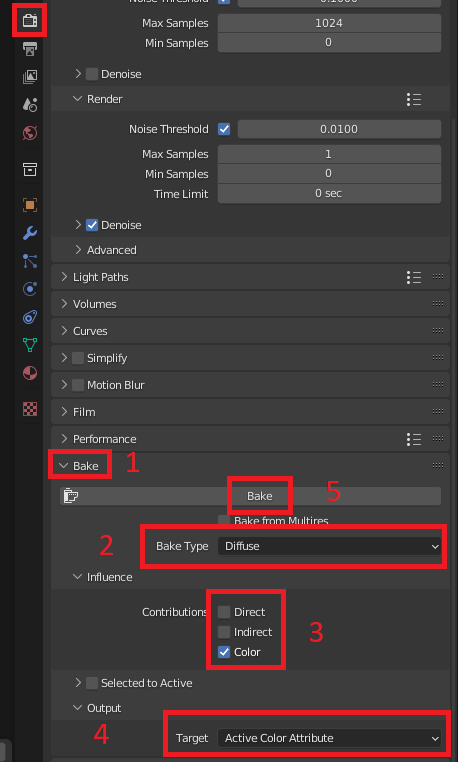
We are now ready to export the model. Here, we will focus on exporting to the .obj format which is widely supported and works well with MegaPose.
Before exporting, save your blender file, and select your model.
Then, go to File > export > Wavefront (.obj)
A new dialog window should open. Select the folder where you wish to store the 3D model, and give it a name.
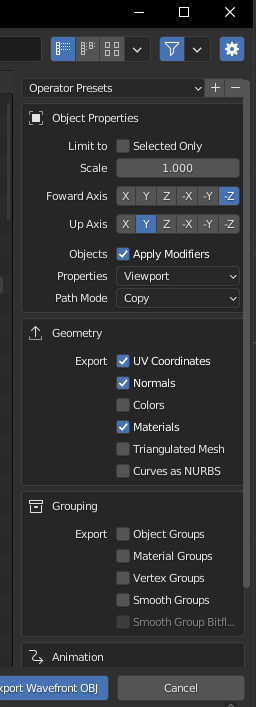
Before confirming the export, there are a few options on right side of the window that are important:
When using with MegaPose, you may encounter multiple issues:
meshes.sample_points not having enough points:.mtl file linked to your model. Make sure that the path to the image texture is correct..gltf or .glb