|
Visual Servoing Platform
version 3.5.0 under development (2022-02-15)
|
|
Visual Servoing Platform
version 3.5.0 under development (2022-02-15)
|
We assume that you have already followed the previous tutorial Tutorial: First java application with ViSP. It could be also useful to follow Tutorial: AprilTag marker detection to get an overview on AprilTag detection in ViSP.
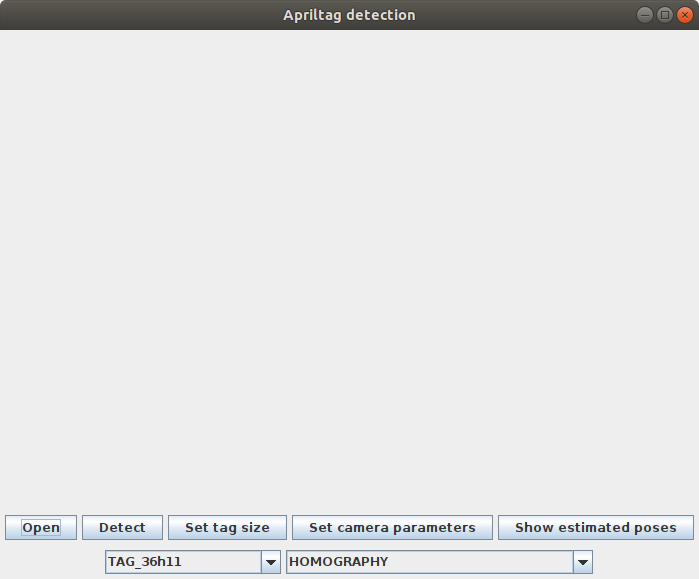
In this tutorial, you will see how to develop an application that allows to load an image and run AprilTag detection in java using ViSP library in Eclipse.
To create the project corresponding to this tutorial:
"File > New > Java Project" menu.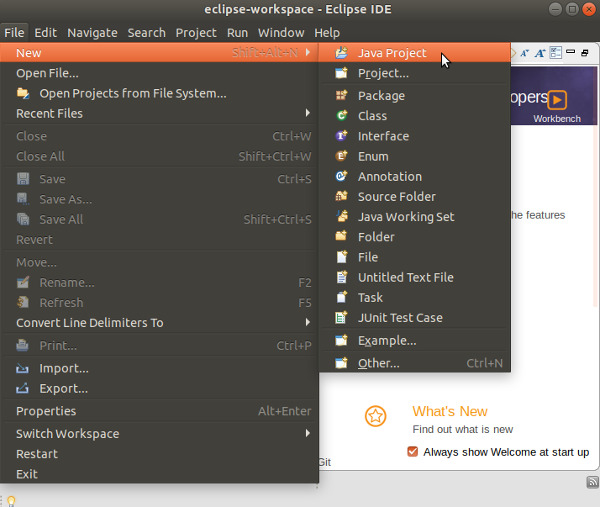
"New Java Project" dialog write the name of your project (let say visp-java-apriltag). In JRE section, select the appropriate execution environment (JavaSE-17 if you install JDK 17, or JavaSE-15 if you install JDK 15 or JavaSE-11 if you install JDK 11). Then press "Finish" button.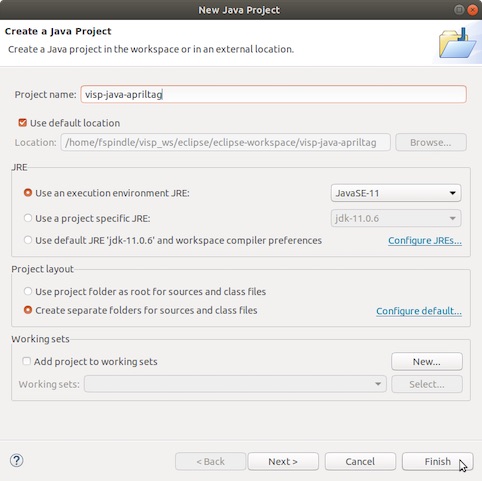
"Don't Create" button.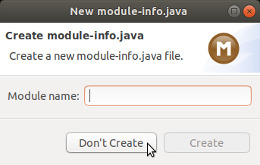
If you followed Tutorial: Installing ViSP for Java, you should already have ViSP library set in your workspace as a user library; if not please check out Tutorial: Installing ViSP for Java. Now you should be ready to add ViSP library to your project.
"Build Path > Add Libraries...".
"User Library" and click on "Next":
"Finish" button.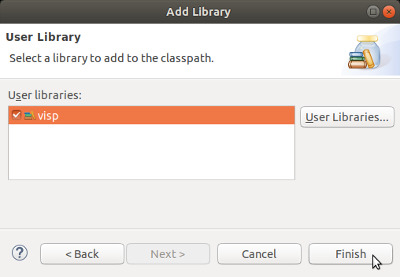
AprilTagDetection.java file in your project, pointing your mouse on src folder and with a right click entering "Import" menu.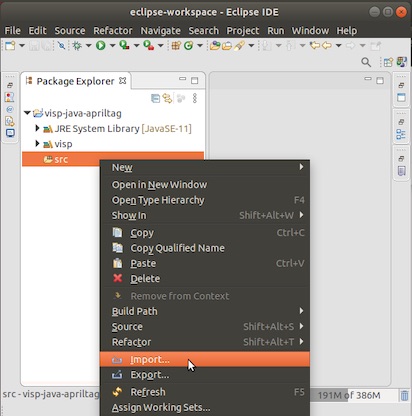
"General > File System" and press "Next" button.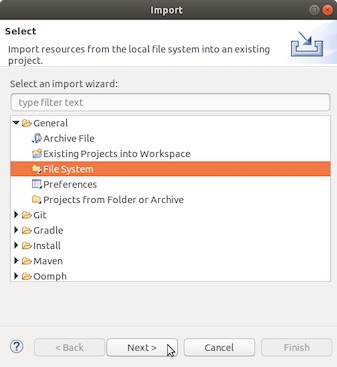
$VISP_WS/visp/tutorial/java/tag-detection folder, enable tag-detection check box and press "Finish" button.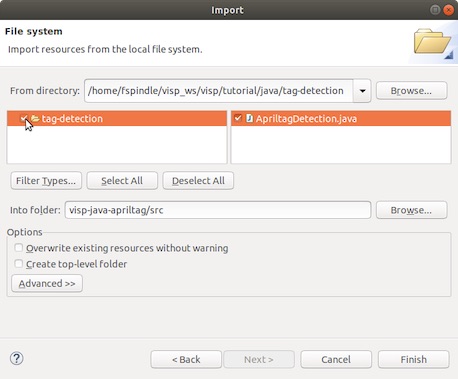
src you should see something similar to: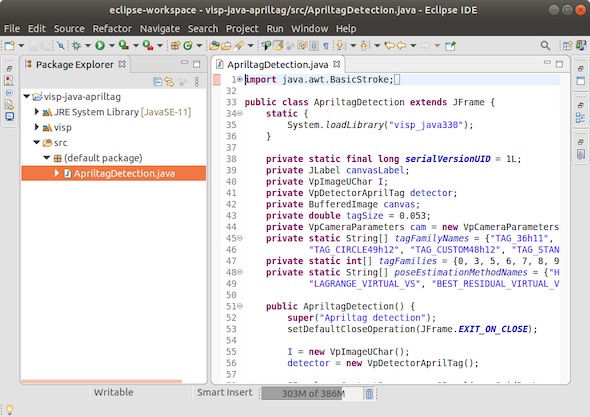
We can now run this application entering"Run > Run" menu.
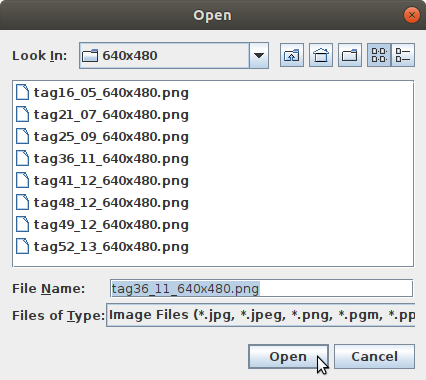
Install ViSP data set, press "Open" button, browse to $ViSP_WS/visp-images/AprilTag/benchmark/640x480 folder and select tag36_11_640x480.png image.
"Detect" button to run AprilTag detection and pose computation over the image.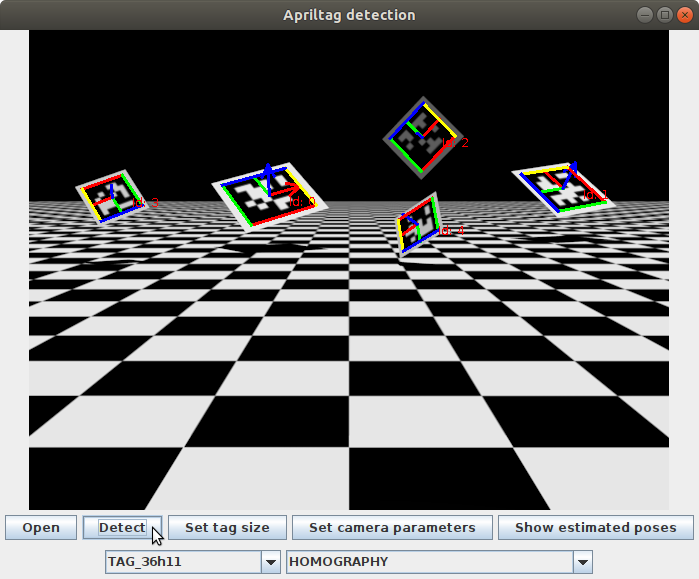
This application allows to modify some settings:
"Set tag size" button you can specify for each tag Id its size. Default size is set to 0.053 meter. For example to modify the size of tags with Id 0 to 0.1 meter, press "Set tag size" to make appear a new window in which you have to press "Add size" button to enter Tag Id 0 and the corresponding size 0.1. Then press "Validate" button. 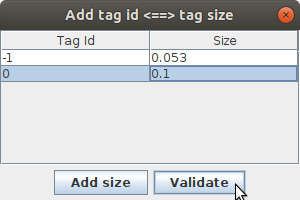
To see estimated tag poses values press "Show estimated poses" button.
Just try it...
You are now ready to continue with Tutorial: Generic model-based tracking in java with ViSP.
 1.8.13