 |
Visual Servoing Platform
version 3.4.0
|
 |
Visual Servoing Platform
version 3.4.0
|
In this tutorial you will learn how to display basic drawings with ViSP either on Unix-like systems (including OSX, Fedora, Ubuntu, Debian, ...) or on Windows.
Note that all the material (source code and images) described in this tutorial is part of ViSP source code and could be downloaded using the following command:
ViSP gui module provides Graphical User Interfaces capabilities. To this end you may use several optional third-party libraries which are: X11, GDI, OpenCV, GTK, Direct3D. In the next example, we will use the first 3rd party that is available from the previous list.
The following example also available in tutorial-viewer.cpp shows how to read and display an image.
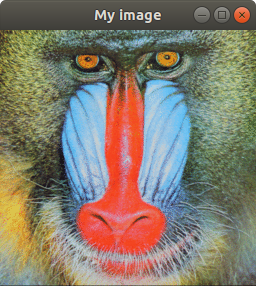
Once build, if you run the corresponding binary loading monkey.png image:
It will open a window containing monkey.png image:

Here is the detailed explanation of the source, line by line :
Include all the headers for image viewers. The two first one are for Windows systems. They require that Direct 3D or the Graphical Device Interface (GDI) coming with the installation of Visual Studio are available. The third one needs GTK that is cross-platform. The fourth is for unix-like systems and requires that libX11 is available. The last one is also cross-platform and requires that OpenCV is available.
Include the header that allows to read/write PGM, PPM, PNG and JPEG images from the disk using vpImageIo class.
Create an instance of a color image where each pixel is coded in RGBa.
The image I is initialized by reading an image file from the disk. If the image format is not supported we throw an exception.
Create an instance of an image display window for image I. The first viewer that is available is used. Here we create the link between the image I and the display d. Note that an image can only have one display.
The title of the display is then set to "My image".
First we display the content of the image I, then we flush the display to render the image.
Here we handle mouse events. We are waiting for a blocking mouse click to end the program.
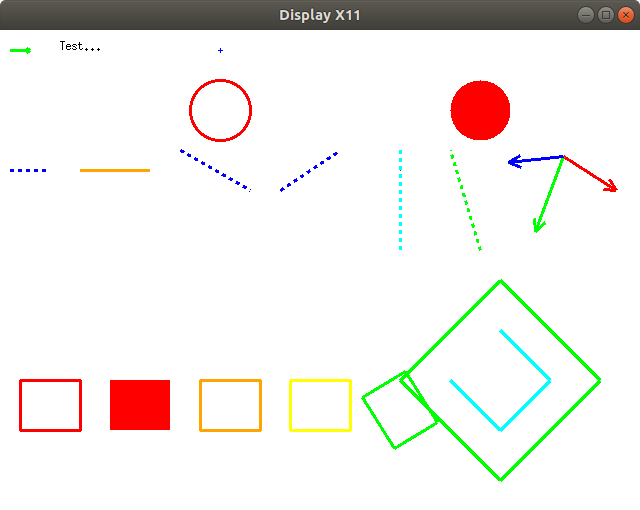
There are a lot of examples in ViSP that show how to display drawings in window overlay. There is testDisplays.cpp that gives an overview.
If you run the corresponding binary:
it will open a window like the following:

As shown in tutorial-draw-point.cpp which source code is given below we use vpDisplay::displayPoint() function to draw a point in the overlay of a windows that displays a 3840 by 2160 grey image that has all the pixels set to 128 gray level.
Here we draw a point at the center of a grey image with red color and thickness 2.
As given in tutorial-draw-line.cpp we use vpDisplay::displayLine() function to draw a line segment on the screen.
Here we draw a red coloured line segment with the specified initial and final coordinates and thickness 10.
As given in tutorial-image-display-scaled-auto.cpp we use vpDisplay::displayCircle() function to draw a circle on the screen.
Here we draw a red coloured filled circle at the center with radius of 200.
As given in tutorial-draw-rectangle.cpp we use vpDisplay::displayRectangle() function to draw a rectangle on the screen.
Here we draw a red coloured filled rectangle with specified top-left coordinates and width and height.
As given in tutorial-draw-cross.cpp we use vpDisplay::displayCross() function to draw a rectangle on the screen.
Here we draw a red coloured cross on the center with speicfied size and thickness 2.
As given in tutorial-draw-text.cpp we use vpDisplay::displayText() function to add text in the window overlay.
Here Hello world is displayed in the middle of the image.
As given in tutorial-export-image.cpp which source code is given below, we use vpDisplay::getImage() function to export the image with the whole drawings in overlay. Then we use vpImageIo::write() to save the image in png format.
As given in tutorial-event-keyboard.cpp which code is given below, we use vpDisplay::getKeyboardEvent() function to get the value of the key pressed.
You are now ready to see how to continue with Tutorial: How to modify an image to insert basic drawings.