|
Visual Servoing Platform
version 3.1.0
|
|
Visual Servoing Platform
version 3.1.0
|
In this tutorial you will learn how to install ViSP from source on Windows 8.1 with Mingw-w64. These steps have been tested:
Mingw-w64 could be found following http://mingw-w64.org/doku.php/download. From that page, click on download "Win-builds" that will bring you to the page http://mingw-w64.org/doku.php/download/win-builds from where you can access to http://win-builds.org/doku.php/download_and_installation_from_windows. Here simply download and run the package manager, in our case we downloaded win-builds-1.5.0.exe file.
C:\mingw as in the following image: 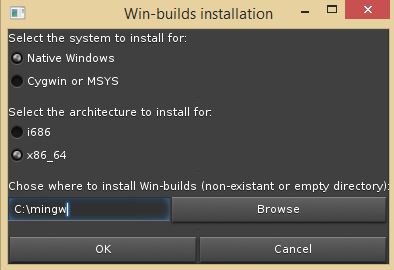
MINGW_DIR environment variable to your installation location in order to allow CMake to detect 3rd party libraries that come with MinGW installer. Fo example, if you install MinGW in C:\folder\mingw-w64, setting MINGW_DIR is simply done running in a cmd terminal: 
C:\mingw\bin folder to the PATH variable. To this end open a cmd terminal and do the following: C:\mingw\bin was added.CMake could be download at : http://www.cmake.org.
cmake-3.10.0-rc3-win64-x64.msi). To install just double click on the msi file.First create a workspace that will contain all ViSP and optional 3rd parties. This workspace is here set to C:\workspace folder, but it could be set to any other location. To create the workspace:
cmd terminal (in your "Start" menu click on "Run" and type in cmd.exe) and run: ViSP is interfaced with several 3rd party libraries. The complete list is provided here. Some of them are automatically detected since they are part of MinGW distribution. Other may be installed from source. We recommend to install the following:
1. Get OpenCV
First you have to get OpenCV:
opencv-3.3.0-vc14.exe Win pack installer.C:\workspace. 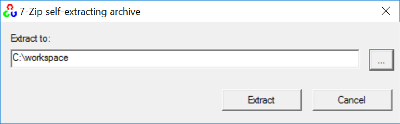
C:\workspace\opencv.C:\workspace\opencv-3.3.0.OpenCV 3.3.0 windows installer contains pre-build libraries compatible with Visual C++ 2015 (vc14) in C:\workspace\opencv-3.3.0\build\x64\vc14. Since here you are using MinGW you need to build yourself OpenCV from source and install the libraries in C:\workspace\opencv-3.3.0\build\x64\mingw.
2. Configure OpenCV
To build OpenCV from source with MinGW:
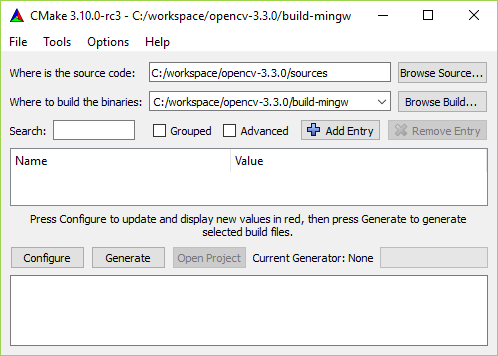
C:\workspace\opencv-3.3.0\sources\build-mingw folder.C:\workspace\opencv-3.3.0\build folder. This is the location of the pre-build libraries that come with the installer. Doing that, allows to install OpenCV libraries in a same parent folder. 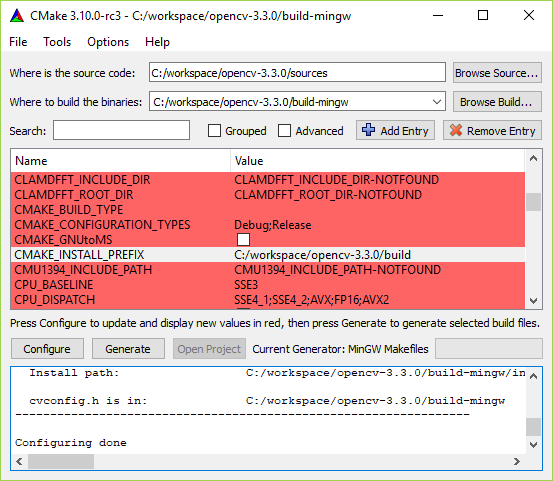
3. Build OpenCV
C:\workspace\opencv-3.3.0\sources\build-mingw folder and start mingw32-make 4. Complete OpenCV installation
Now you have to complete OpenCV installation setting some environment vars:
OpenCV_DIR environment variable. Start up a cmd terminal and enter: C:\workspace\opencv-3.3.0\build is where you have installed OpenCV. Inside this folder you should have a file named OpenCVConfig.cmake.There are different ways to get ViSP source code.
C:\workspace\visp\visp-x.y.z using for axample WinRAR.C:\workspace\visp\visp-x.y.z using for axample WinRAR.We suppose now that ViSP source is in C:\workspace\visp\visp.
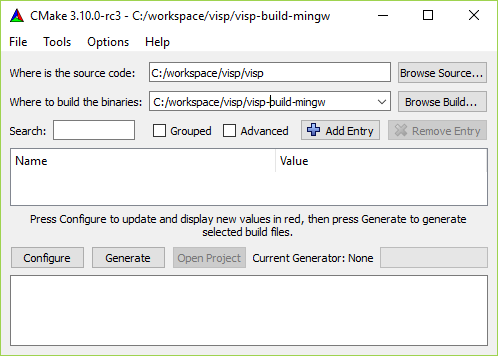
The goal of the configuration step is now to use CMake to produce MinGW Makefiles in C:/workspace/visp/visp-build-mingw.
C:/workspace/visp/visp-build-mingw folder.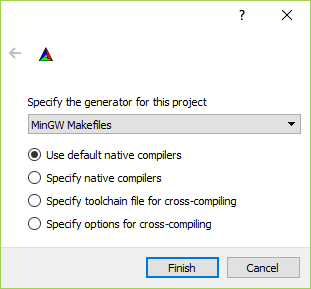
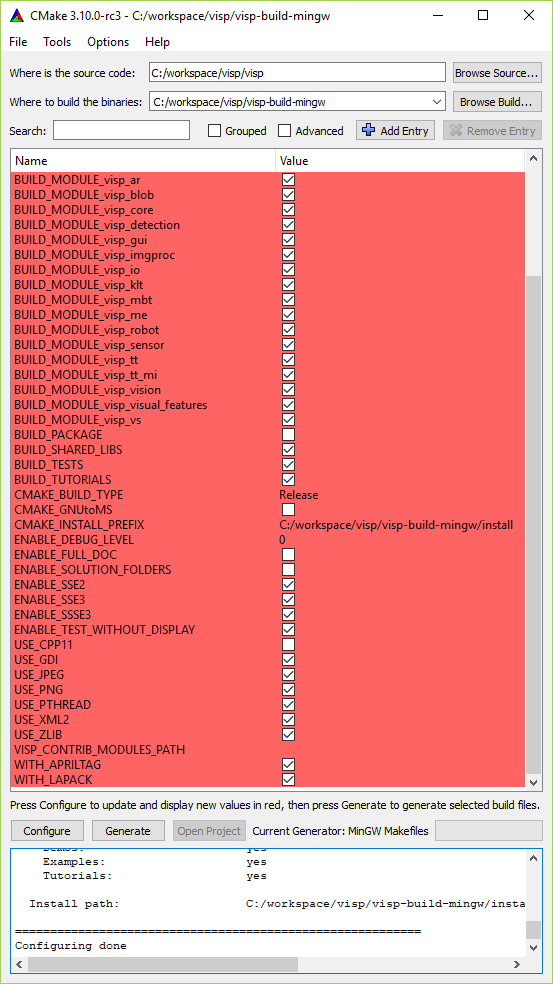
C:/workspace/visp/visp-build-mingw/install. If you want to change the installation folder to C:/Program Files (x86)/ViSP, make sure that you have administrator privileges to write in that folder before modifying CMAKE_INSTALL_PREFIX.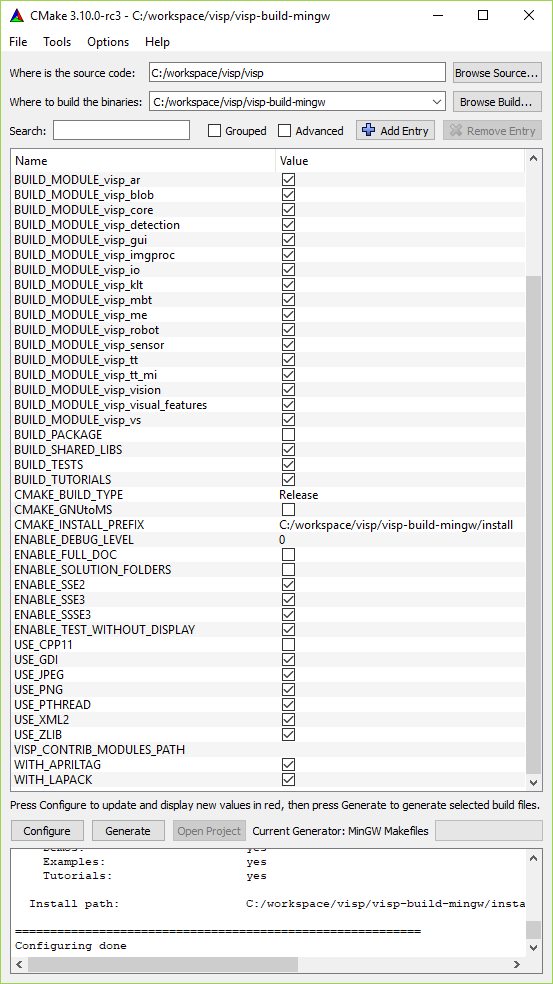
BUILD_SHARED_LIBS option to disable DLL creation.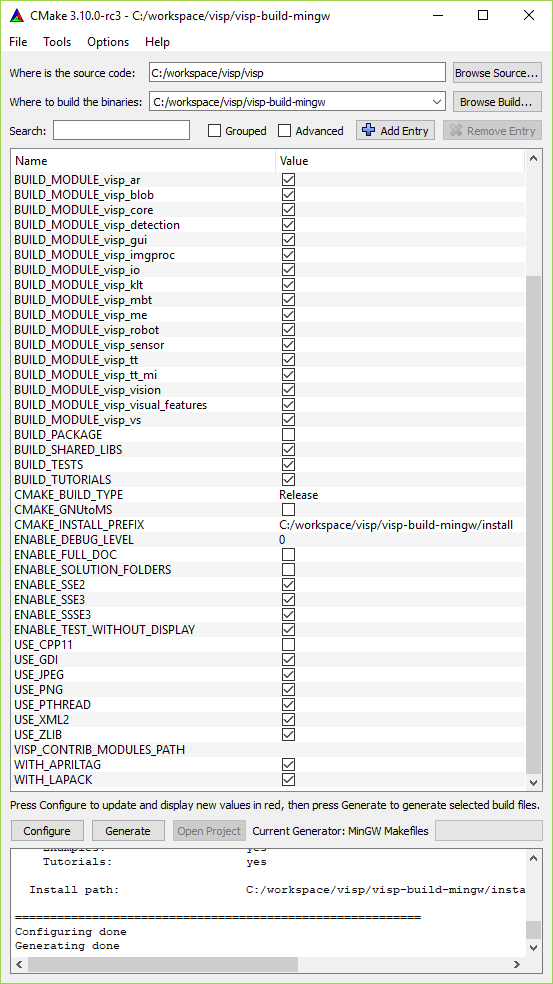
C:/workspace/visp/visp-build-mingw folder you have the Makefile file that will be used by MinGW to build the whole project.cmd terminal, change to C:\workspace\visp\visp-build-mingw folder and run mingw32-make: cmd terminal run: C:/workspace/visp/visp-build-mingw/install/x64/mingw/bin folder you will find ViSP DLL libraries corresponding to the build modules. CMAKE_BUILD_TYPE is set to Debug, the library names are suffixed by "d".If you built static libraries then you are done. Otherwise, if you follow this tutorial step by step you need to add the bin folders path to the systems path. This is because you will use ViSP and OpenCV libraries in form of "Dynamic-link libraries" (also known as DLL). Inside these are stored all the algorithms and information the libraries contains. The operating system will load them only on demand, during runtime. However, to do this he needs to know where they are. The systems PATH variable contains a list of folders where DLLs can be found. Add ViSP and OpenCV libraries path to this and the OS will know where to look if he ever needs the libraries. Otherwise, you will need to copy the used DLLs right beside the applications executable file (exe) for the OS to find it.
To modify the PATH var and add the path to ViSP libraries, open a cmd terminal and run:
Then to add the path to OpenCV 3rd party libraries, close and re-open a cmd-terminal and run:
Then close and re-open a cmd terminal to check if the PATH var was well positioned
Some ViSP examples and tests require data (images, video, models) that are not part of ViSP source code but available in a separate archive named ViSP-images-x.y.z.zip. This archive could be downloaded from http://visp.inria.fr/download page. We provide here after the way to install these data if you want to run ViSP examples.
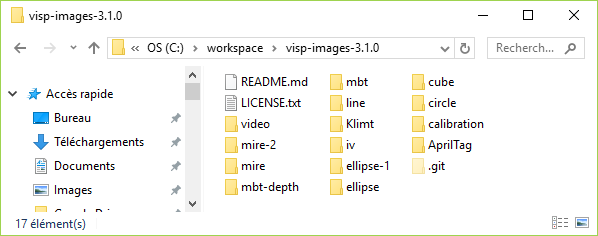
Download visp-images-3.1.0.zip from http://visp.inria.fr/download and uncompress it in your workspace C:/workspace.
ViSP examples and tests are able to detect automatically the location of the requested data if you position an environment variable called VISP_INPUT_IMAGE_PATH. In our case, this variable should be set to C:\workspace\visp-images-3.1.0.
From now, you can try to run ViSP examples and tests. For example, if you want to run C:/worspace/visp/visp-build-mingw/example/device/display/Debug/displayGDI.exe, open a command window, enter in the right folder, and run:

If you encounter the following issue during CMake configuration
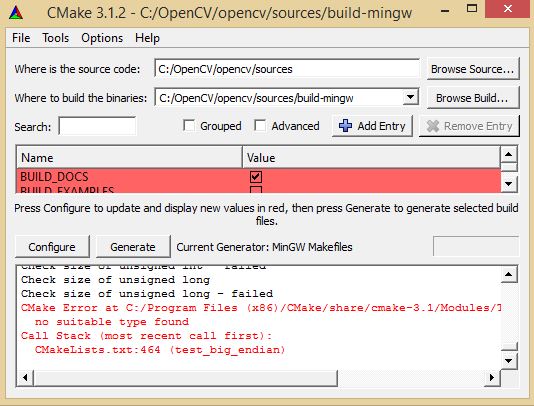
Edit C:\workspace\opencv-2.y.z\sources\CMakeLists.txt file, and line 464 replace:
by:
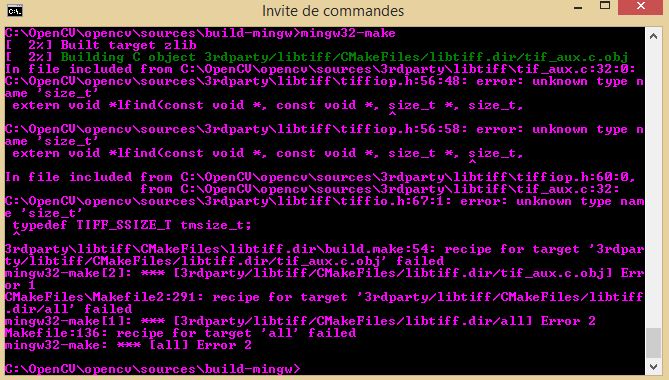
If you encounter a build issue during libtiff build as given in the next image:
The following image shows the link issue that may appear when building OpenCV with MinGW:
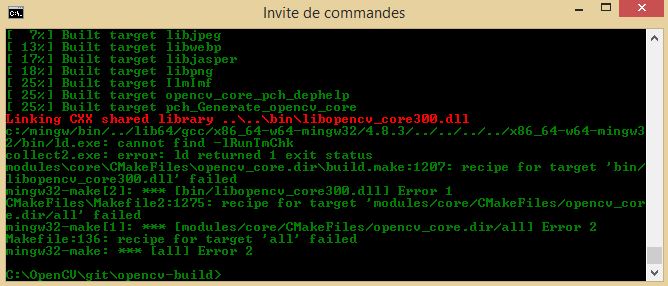
A work arround is to configure OpenCV without ipp support turning WITH_IPP=OFF and then trying to build again.
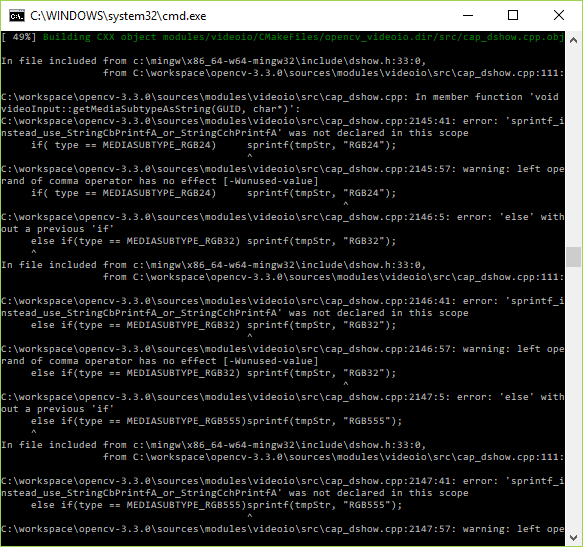
This error that occurs with OpenCV 3.0.0 during cap_dshow.cpp build is known and reported as an issue in https://github.com/Itseez/opencv/pull/5282/commits.
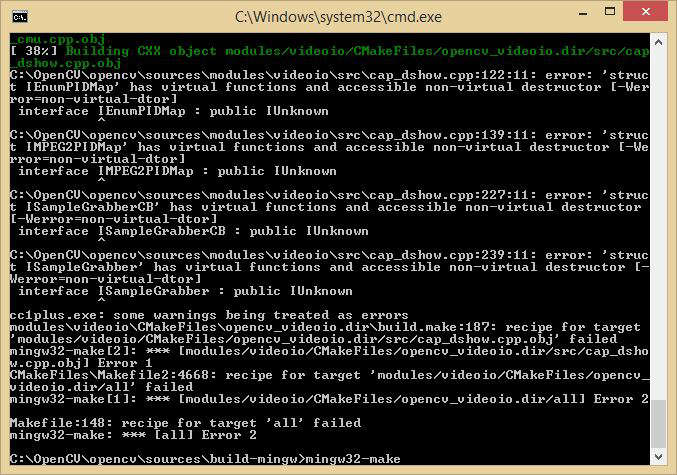
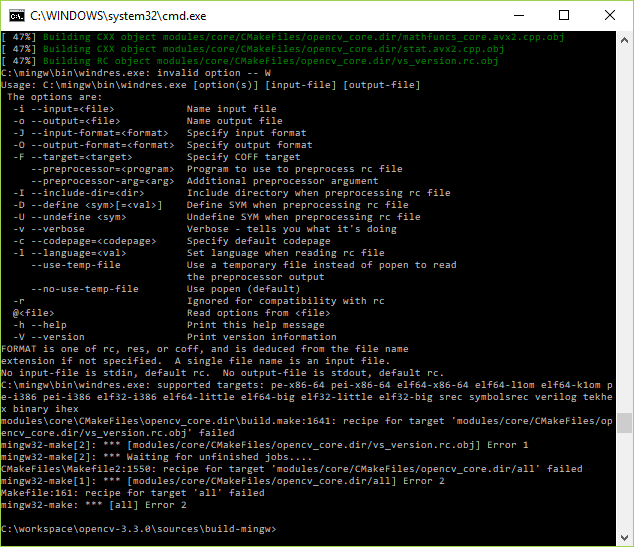
modules/videoio/src/cap_dshow.cpp by adding near line 96: C:\workspace\opencv-2.y.z\sources\cmake\OpenCVConfig.cmake, and line 89 replace: When running mingw32-make if you get the following issue:
the workarround consists in:
ENABLE_PRECOMPILED_HEADERS cmake var OFF: 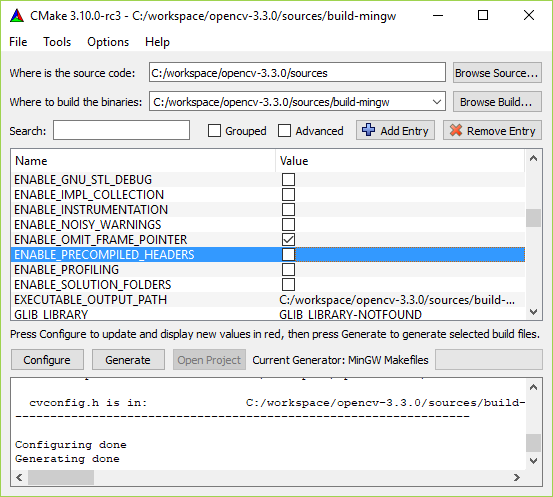
cmd terminal run again mingw32-makeWhen running mingw32-make if you get the following issue:
the workarround consists in:
C:/workspace/opencv-3.3.0/sources/modules/videoio/src/cap_dshow.cpp adding cmd terminal run again mingw32-makeYou are now ready to see the next Tutorial: How to create and build a CMake project that uses ViSP on Unix or Windows that will show you how to use ViSP as a 3rd party to build your own project.
 1.8.13