Visual Servoing Platform  version 3.1.0
Tutorial: How to create a basic iOS application that uses ViSP
Note
We assume that you have "ViSP for iOS" either after following Tutorial: Installation from prebuilt packages for iOS devices or Tutorial: Installation from source for iOS devices. Following one of these tutorials allows to exploit visp3.framework and opencv.framework to build an application for iOS devices.

In this tutorial we suppose that you install visp3.framework in a folder named <framework_dir>/ios. If <framework_dir> corresponds to ~/framework, you should get the following:

$ ls ~/framework/ios
opencv2.framework visp3.framework

Note also that all the material (source code and Xcode project) described in this tutorial is part of ViSP source code and could be downloaded using the following command:

$ svn export https://github.com/lagadic/visp.git/trunk/tutorial/image/ios/GettingStarted

Create a new Xcode project

  • Launch Xcode
  • Follow "File>New>Project" menu and create a new "Single View Application"
img-getting-started-iOS-create.png
  • Click on 
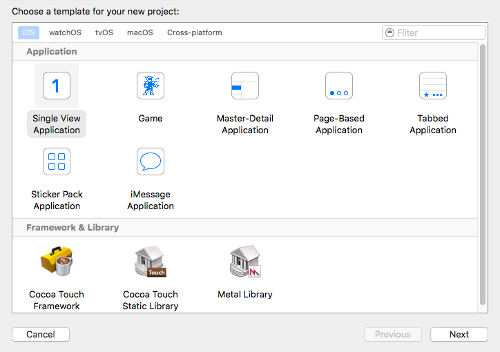
"Next" button and complete the options for your new project:
img-getting-started-iOS-options.png
  • Click on 
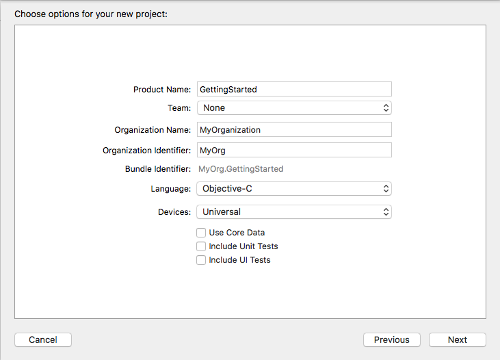
"Next" button and select the folder where the new project will be saved. Once done click on "Create". Now you should have something similar to:
img-getting-started-iOS-new.png

Linking ViSP framework

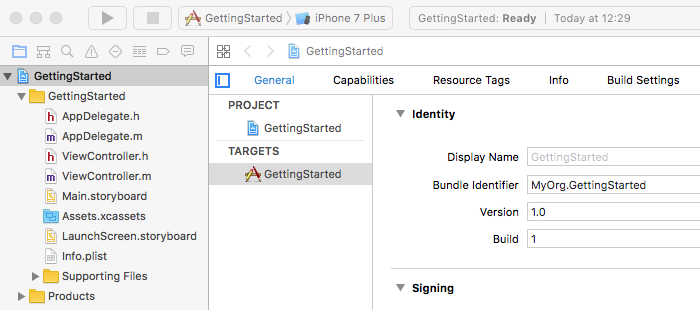
Now we need to link visp3.framework with the Xcode project.

  • Select the project navigator in the left hand panel (1) and click on project name "Getting Started" (2)
img-getting-started-iOS-navigator.png
  • Use the Finder to drag & drop ViSP and OpenCV frameworks located in 
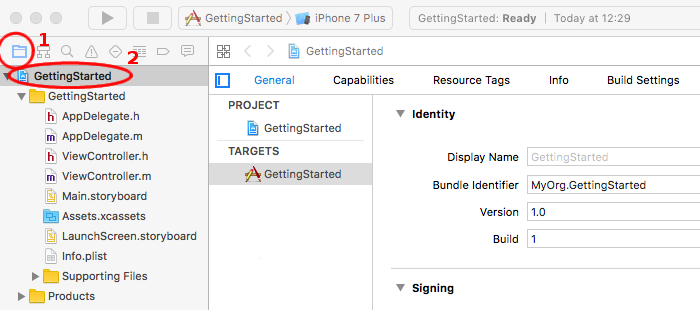
<framework_dir>/ios folder in the left hand panel containing all the project files.
    img-getting-started-iOS-drag-drop.png
  • In the dialog box, enable check box 
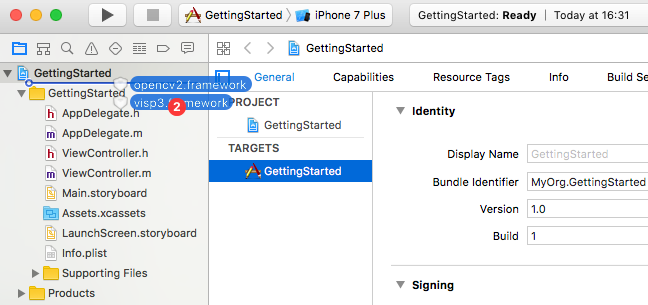
"Copy item if needed" to ease visp3.framework and opencv.framework headers location addition to the build options
img-getting-started-iOS-drag-drop-dialog.png
  • Click on 
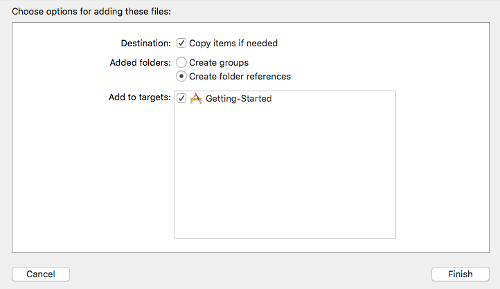
"Finish". You should now get something similar to the following image
    img-getting-started-iOS-link-visp.png

Writing a ViSP iOS application

  • Because we will mix Objective C and ViSP C++ Code, rename 
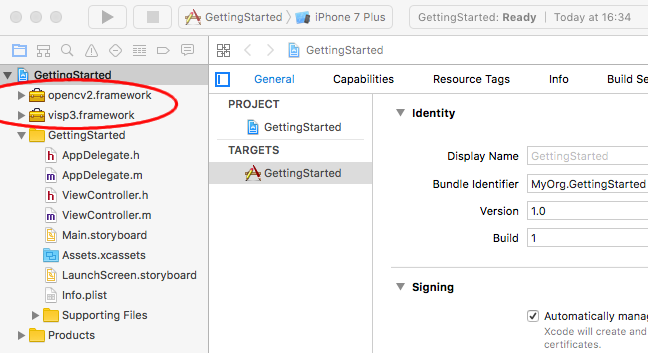
ViewController.m file into ViewController.mm
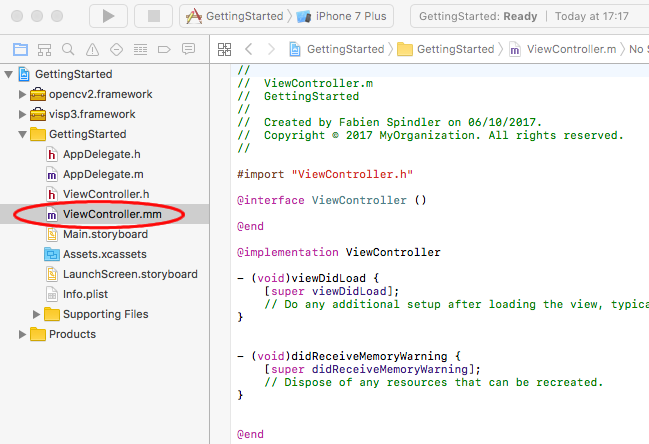
    img-getting-started-iOS-rename.png
  • Now copy/paste the following getting started sample code (inspired from tutorial-homography-from-points.cpp) into ViewController.mm
    #import "ViewController.h"
    #ifdef __cplusplus
    #import <visp3/visp.h>
    #endif
    @interface ViewController ()
    @end
    @implementation ViewController
    #pragma mark - Example of a function that uses ViSP
    - (void)processViSPHomography{
    std::vector<vpPoint> oP(4), aP(4), bP(4);
    double L = 0.1;
    oP[0].setWorldCoordinates( -L,-L, 0);
    oP[1].setWorldCoordinates(2*L,-L, 0);
    oP[2].setWorldCoordinates( L, 3*L, 0);
    oP[3].setWorldCoordinates( -L, 4*L, 0);
    vpHomogeneousMatrix bMo(0,0, 1, 0, 0, 0) ;
    vpHomogeneousMatrix aMb(0.2, 0, 0.1, 0,vpMath::rad(20), 0);
    vpHomogeneousMatrix aMo = aMb*bMo ;
    // Normalized coordinates of points in the image frame
    std::vector<double> xa(4), ya(4), xb(4), yb(4);
    for(int i=0 ; i < 4; i++){
    oP[i].project(aMo);
    xa[i] = oP[i].get_x();
    ya[i] = oP[i].get_y();
    oP[i].project(bMo);
    xb[i] = oP[i].get_x();
    yb[i] = oP[i].get_y();
    }
    // Compute the homography
    vpHomography::DLT(xb, yb, xa, ya, aHb, true);
    std::cout << "Homography:\n" << aHb << std::endl;
    // Compute the 3D transformation
    aHb.computeDisplacement(aRb, atb, n);
    std::cout << "atb: " << atb.t() << std::endl;
    // Compute coordinates in pixels of point 3
    vpImagePoint iPa, iPb;
    vpMeterPixelConversion::convertPoint(cam, xb[3], yb[3], iPb);
    vpMeterPixelConversion::convertPoint(cam, xa[3], ya[3], iPa);
    std::cout << "Ground truth:" << std::endl;
    std::cout << " Point 3 in pixels in frame b: " << iPb << std::endl;
    std::cout << " Point 3 in pixels in frame a: " << iPa << std::endl;
    // Estimate the position in pixel of point 3 from the homography
    vpMatrix H = cam.get_K() * aHb * cam.get_K_inverse();
    // Project the position in pixel of point 3 from the homography
    std::cout << "Estimation from homography:" << std::endl;
    std::cout << " Point 3 in pixels in frame a: " << vpHomography::project(cam, aHb, iPb) << std::endl;
    }
    - (void)viewDidLoad {
    [super viewDidLoad];
    // Do any additional setup after loading the view, typically from a nib.
    [self processViSPHomography];
    }
    - (void)didReceiveMemoryWarning {
    [super didReceiveMemoryWarning];
    // Dispose of any resources that can be recreated.
    }
    @end
    In this sample, we first import the headers to use vpHomography class. Then we create a new function called processViSPHomography(). This function is finally called in viewDibLoad().
  • After the previous copy/paste, you should have something similar to
    img-getting-started-iOS-code.jpeg
  • Now we are ready to build this simple 
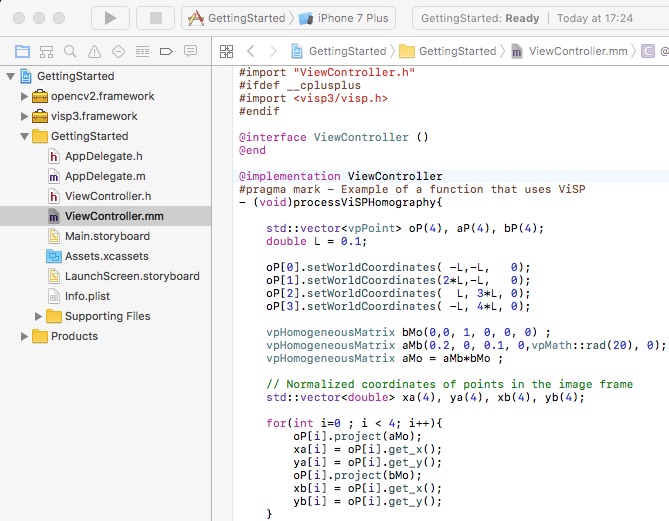
"Getting Started" application using Xcode "Product>Build" menu.
  • You can now run your code using "Product>Run" menu (Simulator or device does not bother because we are just executing code). You should obtain these logs showing that visp code was correctly executed by your iOS project.
    img-getting-started-iOS-log.jpeg

Next tutorial

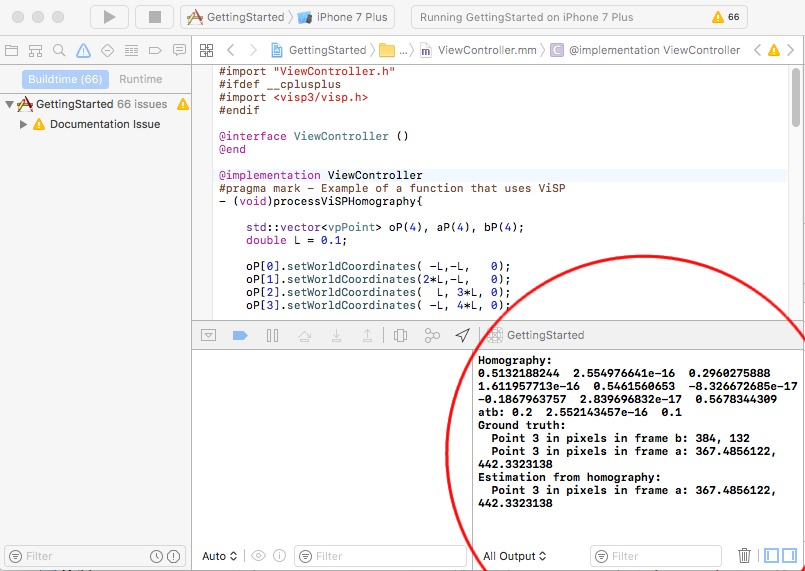
You are now ready to see the Tutorial: Image processing on iOS.