|
Visual Servoing Platform
version 3.5.0 under development (2022-02-15)
|
|
Visual Servoing Platform
version 3.5.0 under development (2022-02-15)
|
This tutorial follows Tutorial: AprilTag marker detection on iOS and shows how to detect AprilTag markers in real time.
In this tutorial, you will be able to learn how to detect with Swift 4 and get camera intrinsic parameters.
All the material (Xcode project) described in this tutorial is part of ViSP source code and could be downloaded using the following command:
$ svn export https://github.com/lagadic/visp.git/trunk/tutorial/ios/AprilTagLiveCamera
Once downloaded, you have just to drag & drop ViSP and OpenCV frameworks available following Tutorial: Installation from prebuilt packages for iOS devices.
Real-time capture of video can be achieved with AVFundation framework. You just apply the detection process you learned from the previous tutorial to each captured image.
This is capturing code in VideoCapture.swift:
Pass image to Image process methods in ViewController.swift:
The camera’s intrinsic parameters can be acquired from each captured image by setting isCameraIntrinsicMatrixDeliveryEnabled to true in the connection settings in VideoCapture.swift:
Note: intrinsic parameters are only supported on some iOS devices with iOS11.
The intrinsic parameters that represent camera features can generally be represented by a matrix of pixel-based focal lengths and principal points (axis centers) in the image. The documentation for Swift is here. Since the principal point almost coincides with the image center, this tutorial uses only the focal length.
Let us consider the Xcode project named AprilTagLiveCamera that is part of ViSP source code and located in $VISP_WS/tutorial/ios/AprilTagLiveCamera.
To open this application, if you followed Tutorial: Installation from prebuilt packages for iOS devices simply run:
$ cd $HOME/framework
$ svn export https://github.com/lagadic/visp.git/trunk/tutorial/ios/AprilTagLiveCamera
$ open AprilTagLiveCamera -a Xcode
or if you already downloaded ViSP following Tutorial: Installation from source for iOS devices run:
$ open $HOME/framework/visp/tutorial/ios/AprilTagLiveCamera -a Xcode
As described in Tutorial: AprilTag marker detection on iOS once opened, you have just to drag & drop ViSP and OpenCV frameworks available in $HOME/framework/ios if you followed Tutorial: Installation from prebuilt packages for iOS devices.
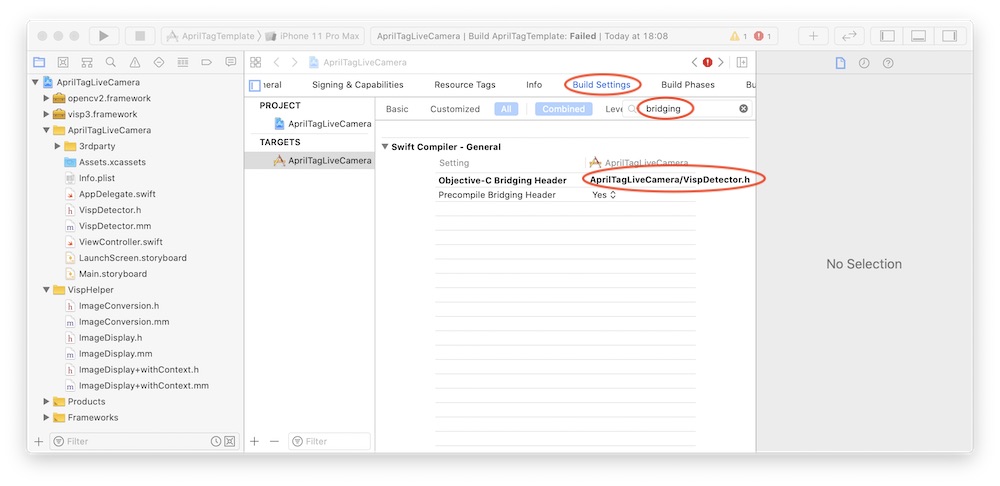
ViSP's AprilTag detection class is currently written in Objective-C. In order to use this Objective-C class from Swift, setting of Bridging-Header is necessary. Look for the "Objective-C Bridging Header" column in the "Build Settings", and make sure that "VispDetector.h", which describes the detector class this time, is set.
The content of VispDetector.h is the following:
and in ViewController.swift you have the following code:
Detection and drawing processing is processed in VispDetector.mm. For details on the detection process, see Tutorial: AprilTag marker detection and on how to draw the pose of a tag, see the previous Tutorial: AprilTag marker detection on iOS.
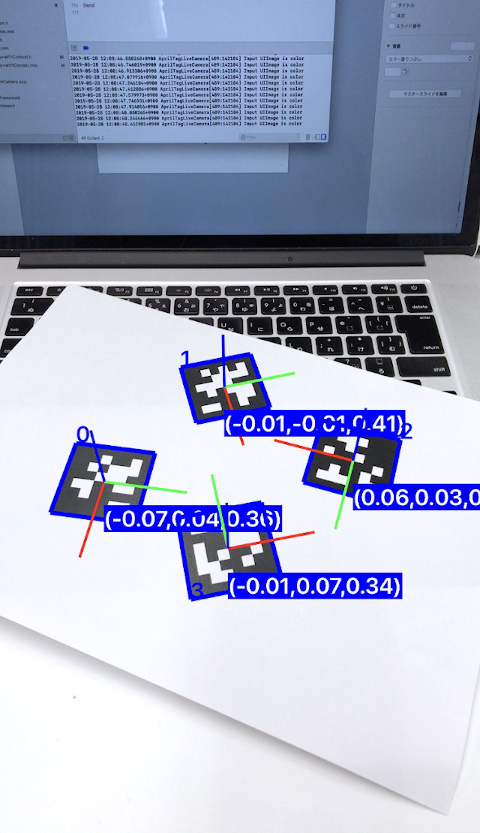
The distance from the iOS device to the marker can be accurately detected if the tag size is properly set. The distance can be obtained using the getTranslationVector() method from the homogeneous transformation matrix (cMo_vec) representing the pose with rotation (R) and position (t) of the marker in camera coordinates. See here for more information vpHomogeneousMatrix class
This is achieved in VispDetector.mm:
Like this image below, you can see the tag id, posture and position from the camera in real time with the video captured image.
 1.8.13