|
ViSP
2.8.0
|
|
ViSP
2.8.0
|
This tutorial focuses on pinhole camera calibration. The goal of the calibration is here to estimate some camera parameters that allows to make the relation between camera's natural units (pixel positions in the image) and real world units (normalized position in meters in the image plane).
If we denote  the position of a pixel in the digitized image, this position is related to the corresponding coordinates
  in the normalized space.
In ViSP we consider two unit conversions:
![\[ \begin{array}{l} u = u_0 + x p_x (1+k_{ud} r^2) \\ v = v_0 + y p_y (1+k_{ud} r^2) \end{array} \]](form_1003.png)

![\[ \begin{array}{l} x = (u-u_0)*(1+k_{du} r^2)/p_x \\ y = (v-v_0)*(1+k_{du} r^2)/p_y \end{array} \]](form_1004.png)

In this model we consider the parameters  where:
 are the coordinates of the principal point in pixel;
 are the ratio between the focal length and the size of a pixel;
 are the parameters used to correct the distortion.
Note that the container dedicated to camera parameters is implemented in the vpCameraParameters class. It allows to consider two kind of models; with or without distortion.
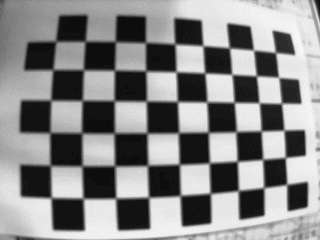
The calibration process allows to estimate the values of these parameters. To this end, one of the following calibration grid can be used:
To calibrate your camera you need to take snapshots of one of these two patterns with your camera. At least 5 good snapshots of the input pattern acquired at different positions are requested for good results.
The source code of the calibration tool is available in camera_calibration.cpp located in example/calibration folder.
We will not describe in detail the source, but just mention that:
libjpeg and libpng 3rd party libraries are installed and detected during ViSP configuration, you may consider .pgm, .ppm, .jpg, .png images. Default configuration files are provided in example/calibration folder;camera.xml file.In this section we consider the OpenCV chessboard pattern that has a size of 9 by 6. Each square of the chessboard is 0.025 meters large. We took 5 images called chessboard-01.png, chessboard-02.png, chessboard-03.png, chessboard-04.png, chessboard-05.png. Hereafter we give an example of such an image. These images are located in /tmp folder.
Before starting the calibration we need to create a configuration file. We create /tmp/chessboard.cfg with the following content:
To estimate the camera parameters, just enter in ViSP <binary_dir>/examples/calibration and run:
This command will produce the following output:
The resulting parameters are also saved in ./camera.xml file.
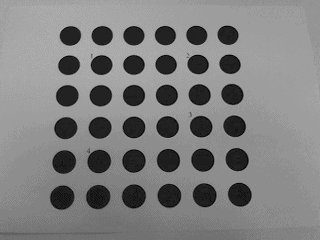
In this section we consider the ViSP symmetric circle grid pattern that has a size of 6 by 6. Each circle center of gravity is 0.034 meters distant from it's horizontal or vertical neighbor. We took 6 images called circles-02.pgm, circles-03.pgm, ..., circles-07.pgm. Hereafter we give an example of such an image. These images are located in /tmp folder.
Before starting the calibration we need to create a configuration file. We create /tmp/circles-grid.cfg with the following content:
To estimate the camera parameters, just enter in ViSP <binary_dir>/examples/calibration and run:
This command will produce the following output:
The resulting parameters are also saved in ./camera.xml file.
Note here that the following line indicates that the 5th frame corresponding to the image circles-05.pgm was not used in the calibration process since the status of the image processing is false.
Once the camera is calibrated, you can remove the distortion in the images. The following example available in tutorial-undistort.cpp shows how to do it.
In this example we first load the image chessboard.pgm
Then we read the camera parameters with distortion of a camera named "Camera" from ./camera.xml file. This is only possible if ViSP was build with libxml2 3rd party support.
If vpXmlParserCamera is not available (this may occur if ViSP was not build with libxml2), we initialize the camera parameters "by hand" using the following code:
Finally, we create a new image Iud where distortion is removed. This image is saved in chessboard-undistort.pgm.
The resulting chessboard-undistort.pgm image is the following.
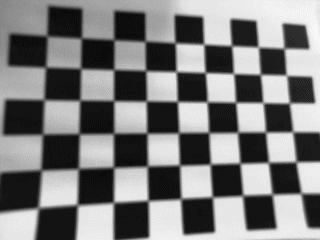
chessboard-undistort.pgm image where distortion was removed. 1.8.9.1
