|
Visual Servoing Platform
version 3.6.1 under development (2024-04-19)
|
|
Visual Servoing Platform
version 3.6.1 under development (2024-04-19)
|
We assume that you have already followed the previous tutorial Tutorial: Installing ViSP for Java.
This tutorial will guide you through the creation of a simple Java console application using ViSP library in Eclipse.
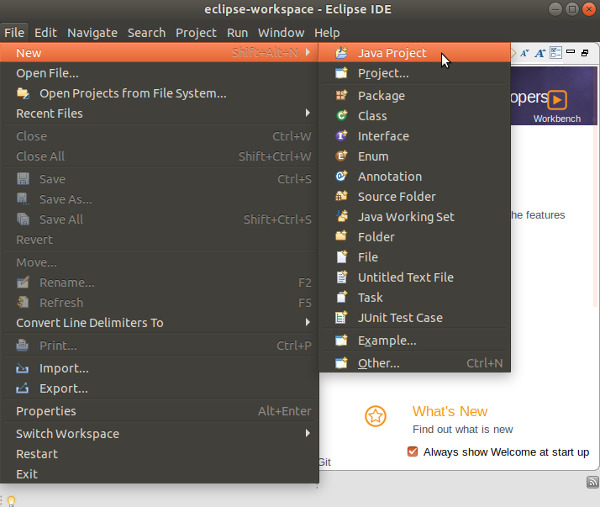
Open Eclipse and create a new Java project entering "File > New > Java Project" menu.
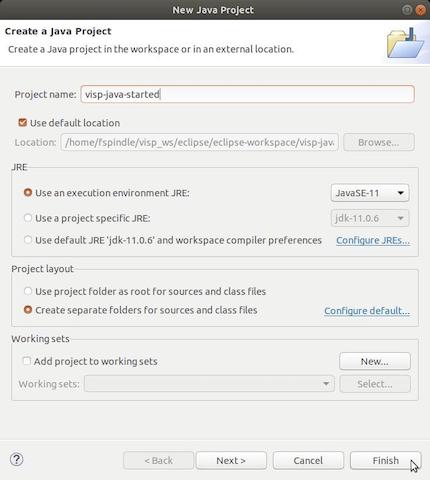
In the "New Java Project" dialog write the name of your project (let say visp-java-started). In JRE section, select the appropriate execution environment (JavaSE-17 if you install JDK 17, or JavaSE-15 if you install JDK 15 or JavaSE-11 if you install JDK 11). Then press "Finish" button.
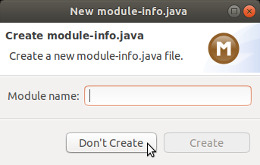
In the "New module-info.java" dialog that may appear, press "Don't Create" button.
If you followed Tutorial: Installing ViSP for Java, you should already have ViSP library set in your workspace’s user libraries; if not please check out Tutorial: Installing ViSP for Java. Now you should be ready to add ViSP library to your project.
"Build Path > Add Libraries...".
"User Library" and click on "Next":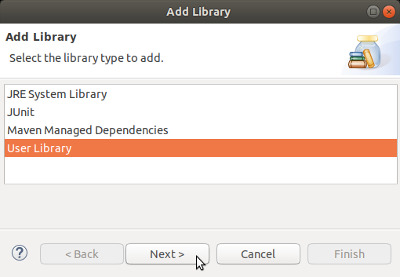
"Finish" button. At this point, if you don't see visp, it means that you didn't follow the section Creating a user library.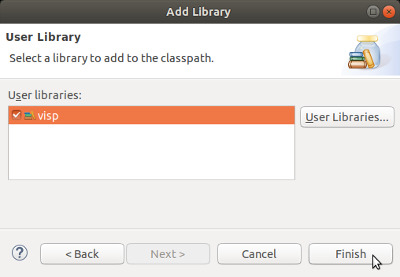
To create a simple application that uses ViSP:
"New > Class" menu.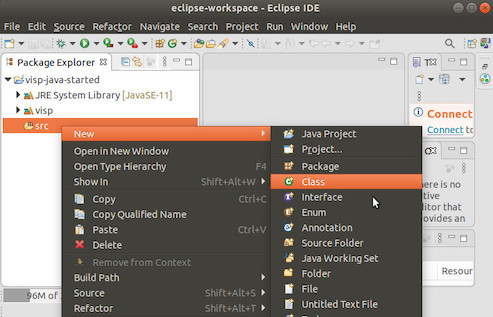
Started and press "Finish" button.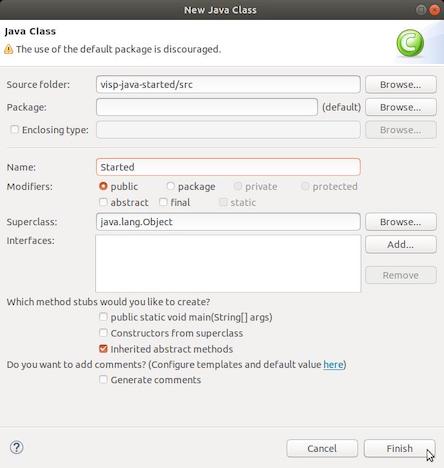
Now we are ready to add the code of our first application in Started.java file. The code of the Started class is the following:
core module (VpCameraParameters, VpColVector, VpImageRGBa, VpImageUChar, VpMatrix and VpRGBa). Then we load visp_java library. After we continue defining the main() method that shows how to manipulate ViSP classes in Java.visp-java-started project in Started.java file to have something similar to: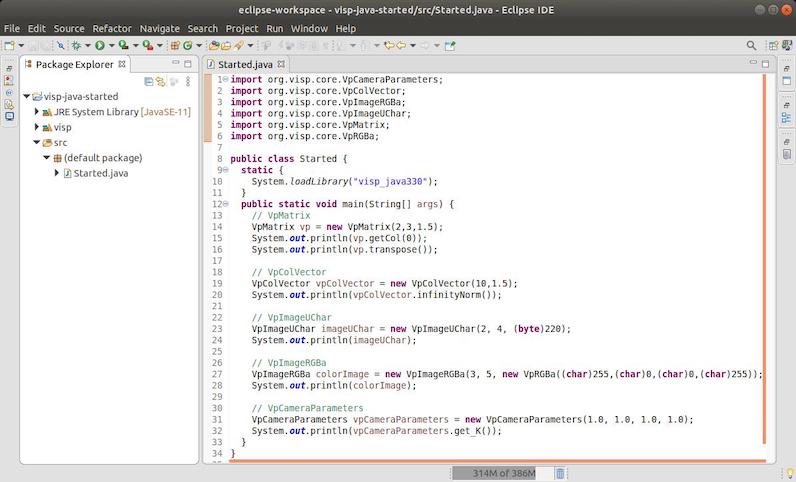
"Run > Run" menu. You should have the following output: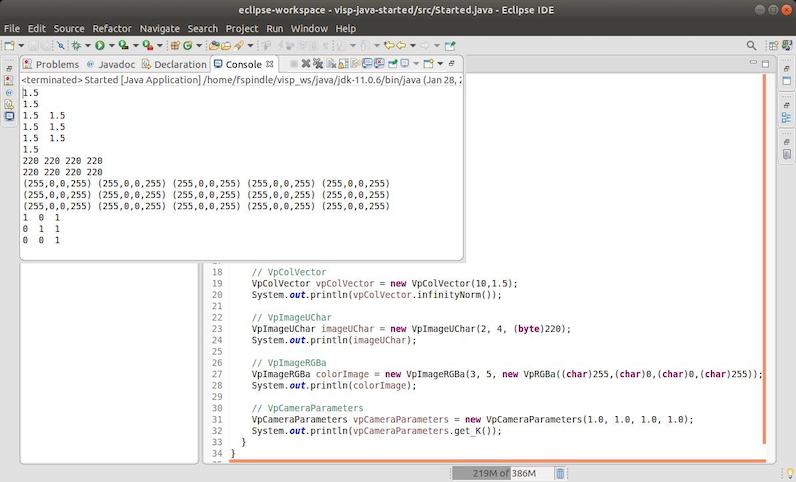
As shown in the next image, if you get the following issue on Ubuntu 18.04:
Exception in thread "main" java.lang.UnsupportedClassVersionError: org/visp/core/VpMatrix has been compiled by a more recent version of the Java Runtime (class file version 57.0), this version of the Java Runtime only recognizes class file versions up to 55.0
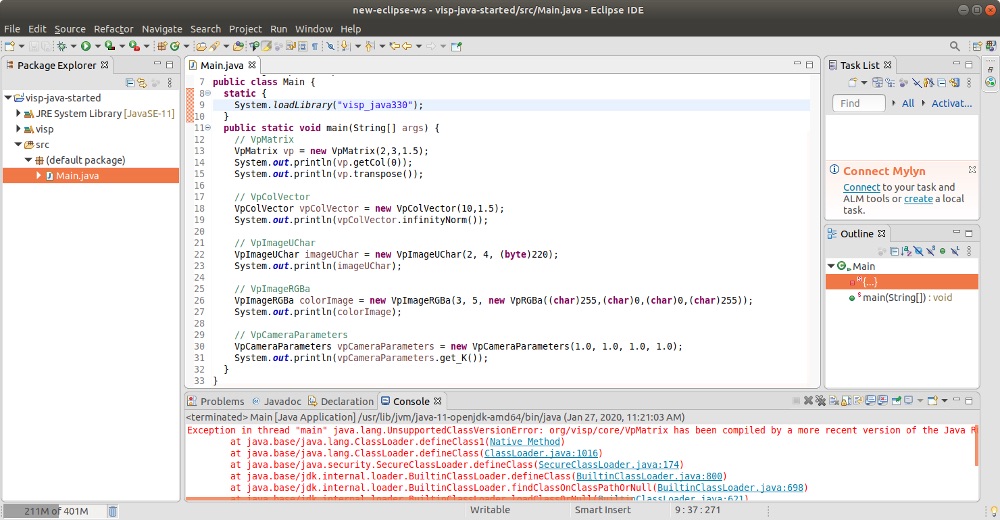
it means probably that you use JRE System Library 11 installed in /usr/lib/jvm/java-1.11.0-openjdk-amd64 while ViSP is build with a more recent java version obtained after downloading JDK 13 for example.
To fix this issue, as explained in Tutorial: Installing ViSP for Java install JDK 11 and do a fresh ViSP build using java 11.
As shown in the next image, if you experience the following exception after entering "Run > Run" menu:
Exception in thread "main" java.lang.UnsatisfiedLinkError: no visp_java321 in java.library.path: [/home/fspindle/visp-ws/visp-build/lib]
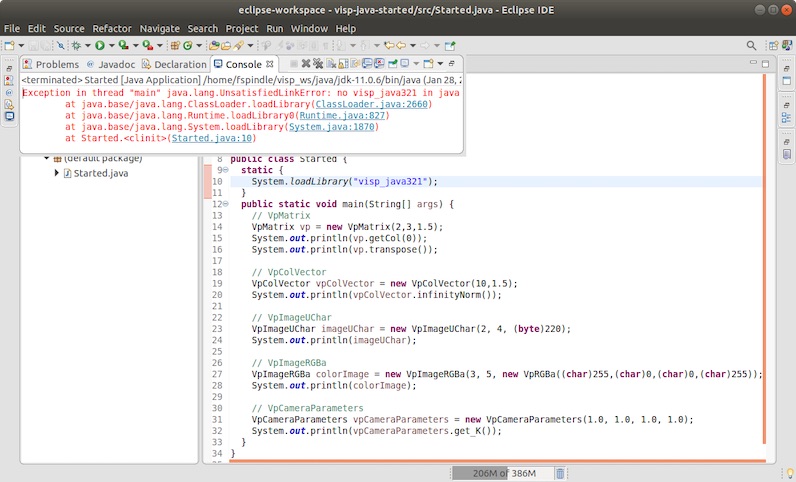
visp-<version>.jar is present in $VISP_DIR/visp-build/bin: $ ls $VISP_DIR/visp-build/bin visp-331.jarIf this java archive is missing and if you follow Tutorial: Installing ViSP for Java it means that JDK was not detected during CMake configuration or that you didn't build ViSP
$VISP_DIR/visp-build/bin System.loadLibrary("visp_java331");
Running any Java app based on ViSP can lead to the following issue:
  INTEL MKL ERROR: /opt/intel/compilers_and_libraries_2020.0.166/linux/mkl/lib/intel64_lin/libmkl_avx2.so: undefined symbol: mkl_sparse_optimize_bsr_trsm_i8.
  Intel MKL FATAL ERROR: Cannot load libmkl_avx2.so or libmkl_def.so.
There is no other satisfactory solution than to disable the use of Intel MKL 3rd party, configure and rebuilt ViSP libraries without MKL support.
To this end, in a terminal launch ccmake ../visp and set USE_BLAS/LAPACK option to an other value than MKL; it could be OpenBLAS, Atlas, GSL, Netlib or OFF. It is recommended to set this var to OFF only when there is no other Blas/Lapack 3rd party available.
A complete discussion about this issue is given here in issue #806.
You are now ready to continue with Tutorial: AprilTag detection in java with ViSP.