|
Visual Servoing Platform
version 3.1.0
|
|
Visual Servoing Platform
version 3.1.0
|
In this tutorial you will learn how to install ViSP from source on Windows 8.1 or 10.0 with Visual C++ 2013. These steps have been tested on Windows 10.0 (64 bit), with CMake 3.9.6 and Visual Studio Express 2013.
cmake-3.9.6-win64-x64.msi). To install just double click on the msi file.First create a workspace that will contain all ViSP and optional 3rd parties. This workspace is here set to C:\workspace folder, but it could be set to any other location. To create the workspace:
cmd terminal (in your "Start" menu click on "Run" and type in cmd.exe) and run: ViSP is interfaced with several 3rd party libraries. The complete list is provided here. If you are with Windows 8.1 we recommend to install Windows SDK 3rd party. We recommend also to install OpenCV 3rd party. Other 3rd parties like Ogre3D 3rd party are optional and should be considered only by expert developers.
If you are under Windows 8.1 we recommend to install the "Windows Software Development Kit (SDK) for windows 8.1" to get the Graphical Device Interface (GDI) capabilities. The GDI is used in ViSP to display images in a window thanks to vpDisplayGDI class.
1. Get OpenCV
First you have to get OpenCV:
opencv-3.0.0.exe Win pack installer.C:\workspace. 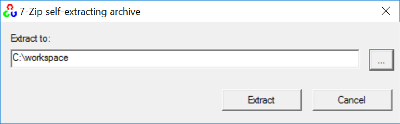
C:\workspace\opencv. C:\workspace\opencv\build\x64\vc12 and also libraries compatible with Visual C++ 2012 (vc11) in C:\workspace\opencv\build\x64\vc11. With a more recent OpenCV release you need to build yourself OpenCV from source with Visual C++ 2013 (vc12) as it is done in Tutorial: Installation from source for Windows with Visual C++ 2017 (vc15).C:\workspace\opencv-3.0.0.2. Complete OpenCV installation
Now you have to complete OpenCV installation setting some environment vars:
OpenCV_DIR environment variable. Start up a cmd terminal and enter: C:\workspace\opencv-3.0.0\build is where you have installed OpenCV. Inside this folder you should have a file named OpenCVConfig.cmake.I you have an Intel RealSense Depth camera (F200, SR300, R200, LR200, ZR300, and D400 series cameras), you may install librealsense 1.12.1. Otherwise you can skip this section.
1. Get librealsense 1.12.1
  C:\> cd C:\workspace
  C:\> git clone https://github.com/IntelRealSense/librealsense.git librealsense-1.12.1
  C:\> cd librealsense-1.12.1
  C:\> git checkout tags/v1.12.1
C:\workspace\librealsense-1.12.1 folder.2. Configure librealsense 1.12.1
C:/workspace/librealsense-1.12.1/build-vc12: 
CMAKE_INSTALL_PREFIX var to C:/workspace/librealsense-1.12.1/build-vc12 folder location. 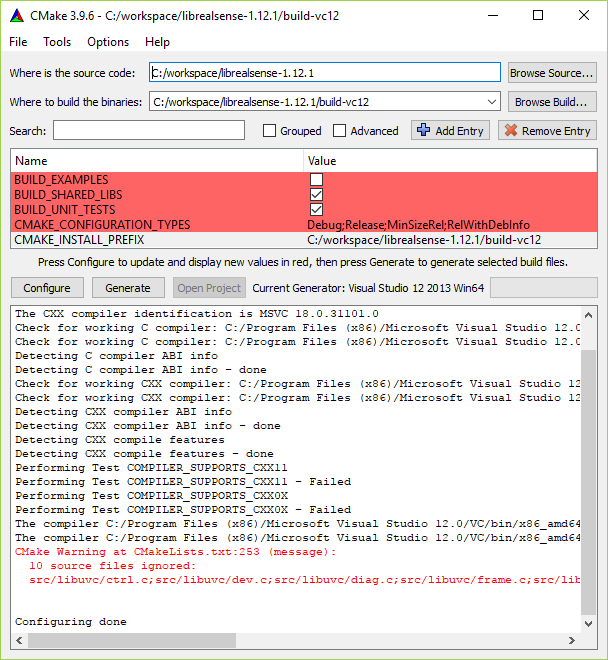
3. Install librealsense 1.12.1
C:/workspace/librealsense-1.12.1/Realsense.sln solution file. This action will open Realsense project in Visual Studio C++ 12 2013.Release configuration and build INSTALL target 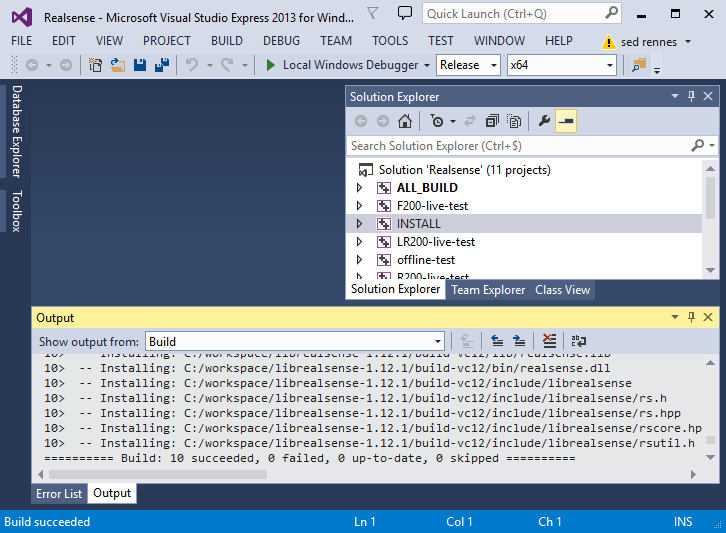
C:/workspace/librealsense-1.12.1/build-vc12/bin/realsense.dll4. Complete librealsense 1.12.1 installation
REALSENSE_DIR environment variable: If you are interested in augmented reality (see vpAROgre), or if you want to enable advanced visibility computation during model-based tracking (see vpMbTracker::setOgreVisibilityTest() and Tutorial: Markerless model-based tracking) we recommend to install Ogre3D. You can check if a prebuild SDK matches your Visual C++ version, and follow the SDK installation instructions. You can also install the lastest release from source. Based on our experience, this is what we recommend.
Ogre source code is hosted on BitBucket. On Ogre wiki you will find useful information to build and install Ogre from source. Hereafter we give the main steps.
1. Get Ogre prerequisities
2. Get Ogre dependencies
C:\Ogre\ogredeps as in the next image: 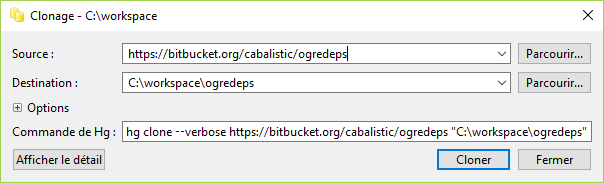
C:\workspace\ogredeps3. Build Ogre dependencies
C:\workspace\ogredeps and build location pointing to C:\workspace\ogredeps\build-vc12. Select Visual Studio 12 2013 Win64 as generator, click on "Configure" button twice and then on "Generate" button. You should have something similar to the next image: 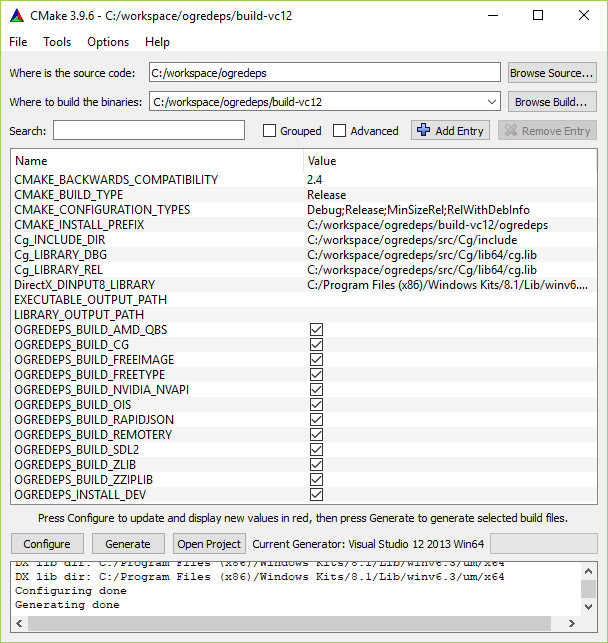
C:\workspace\ogredeps\build-vc12\OGREDEPS.sln solution file with Visual C++.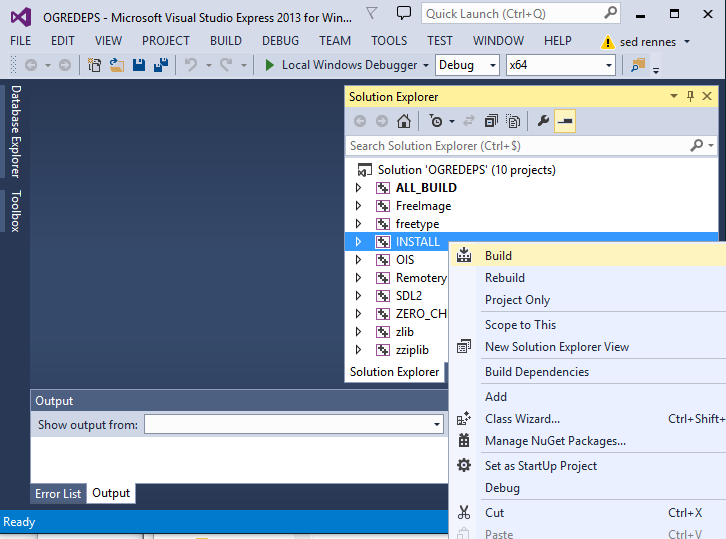
DXSDK_DIR that is not set, see Unable to build ogredeps: DXSDK_DIR missing for a work arround.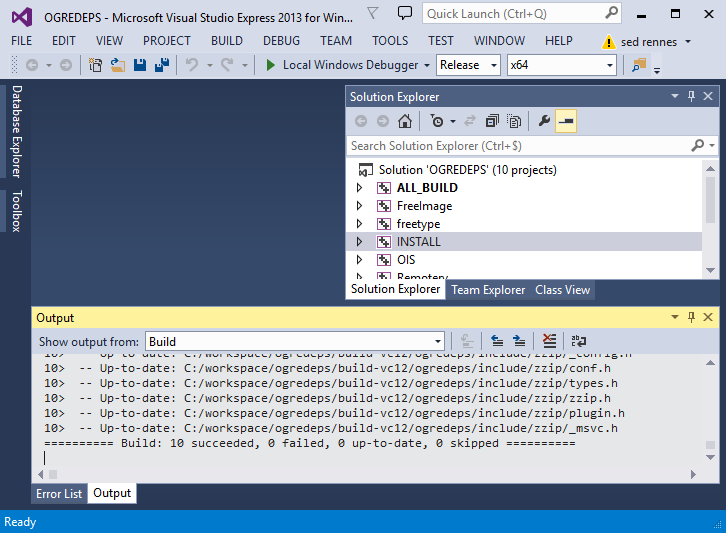
C:\workspace\ogredeps\build-vc12\ogredeps\bin you will find the cg.dll and OIS.dll dependencies build in Debug and Release:OGRE_DEPENDENCIES_DIR environment variable pointing to C:\workspace\ogredeps\build-vc12\ogredeps 4. Get Ogre source
C:\workspace\ogre and select revision v1-10-9 corresponding to the branch of the latest release as presented in the next image: 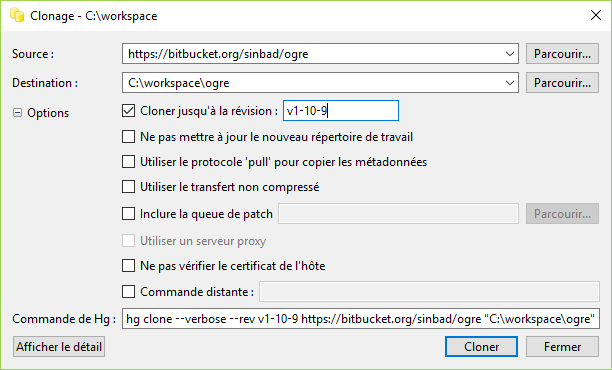
C:\workspace\ogre5. Build Ogre source
C:\workspace\ogre and build location pointing to C:\workspace\ogre\build-vc12. Select "Visual Studio 12 2013 Win64" as generator, click on "Configure" button and then on "Generate" button. You should have something similar to the next image: 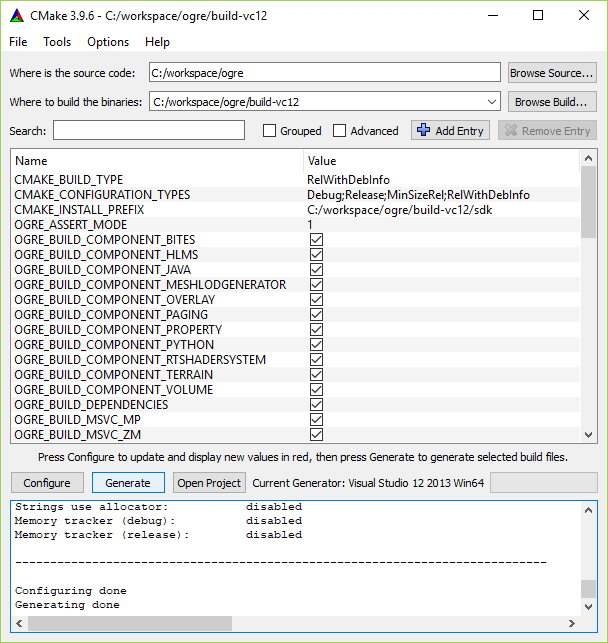
C:\workspace\ogre\build-vc12\sdk.C:\workspace\ogre\build-vc12\OGRE.sln solution file with Visual C++.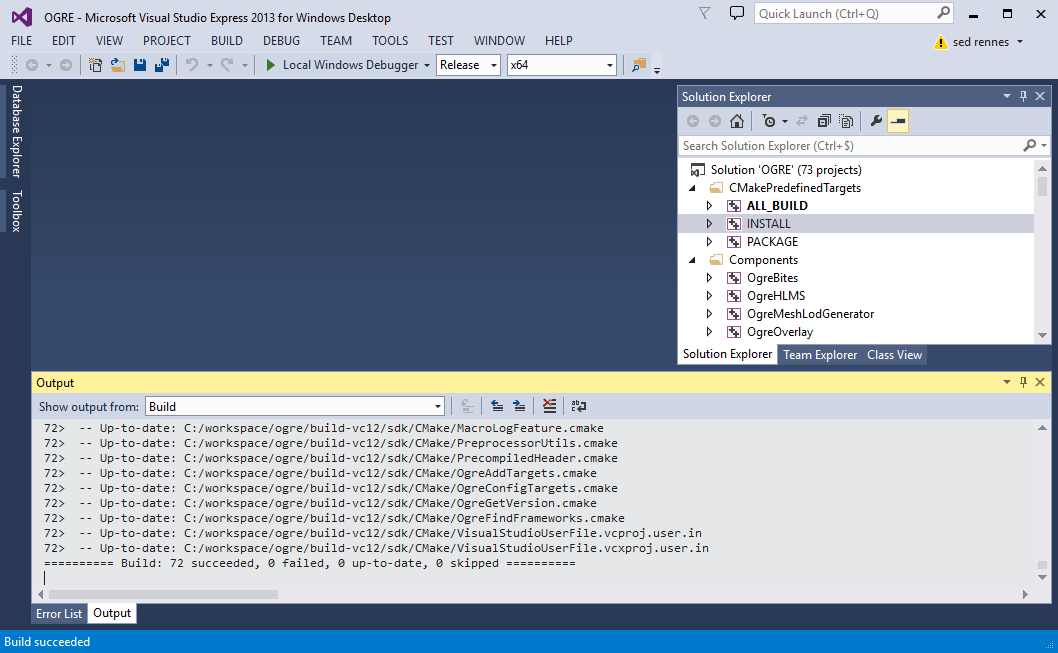
C:\workspace\ogre\build-vc12\sdk\bin you will find all the libraries in Debug and Release configuration, including cg and OIS dependencies that were build previously. 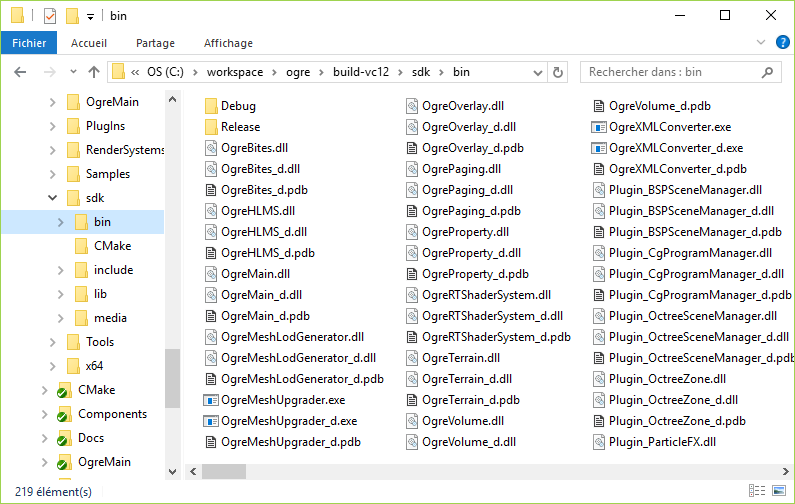
6. Complete Ogre installation
OGRE_DIR environment variables to C:\workspace\ogre\build-vc12\sdk location. There are different ways to get ViSP source code.
C:\workspace\visp\visp-x.y.z using for axample WinRAR.C:\workspace\visp\visp-x.y.z using for axample WinRAR.We suppose now that ViSP source is in C:\workspace\visp\visp.
The goal of the configuration step is now to use CMake to produce a Visual Studio C++ solution file that will be located in C:/workspace/visp/visp-build-vc12.
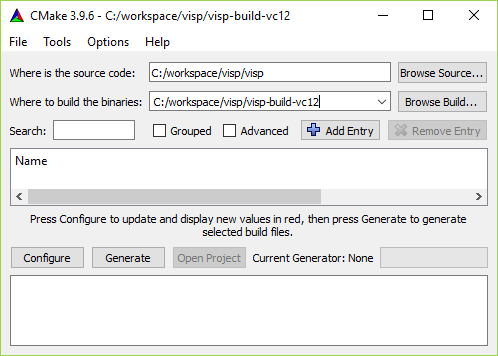
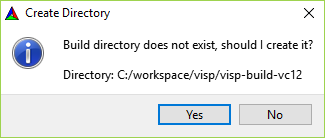
C:/workspace/visp/visp-build-vc12 folder.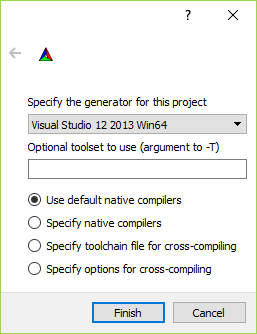
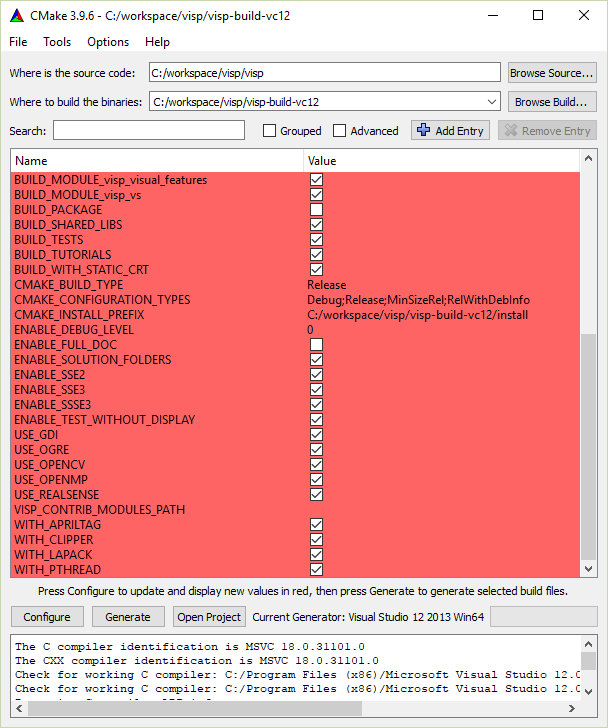
C:/workspace/visp/visp-build-vc12/install. If you want to change the installation folder to C:/Program Files (x86)/ViSP, make sure that you have administrator privileges to write in that folder before modifying CMAKE_INSTALL_PREFIX.
BUILD_SHARED_LIBS option to disable DLL creation.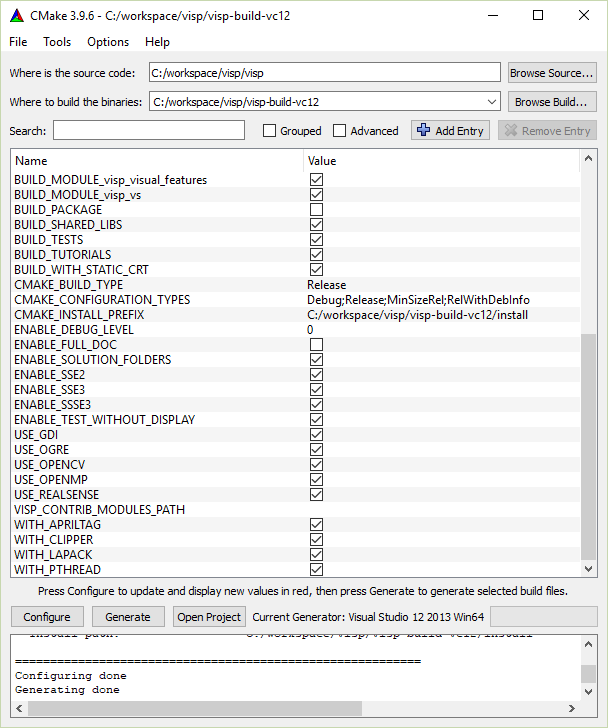
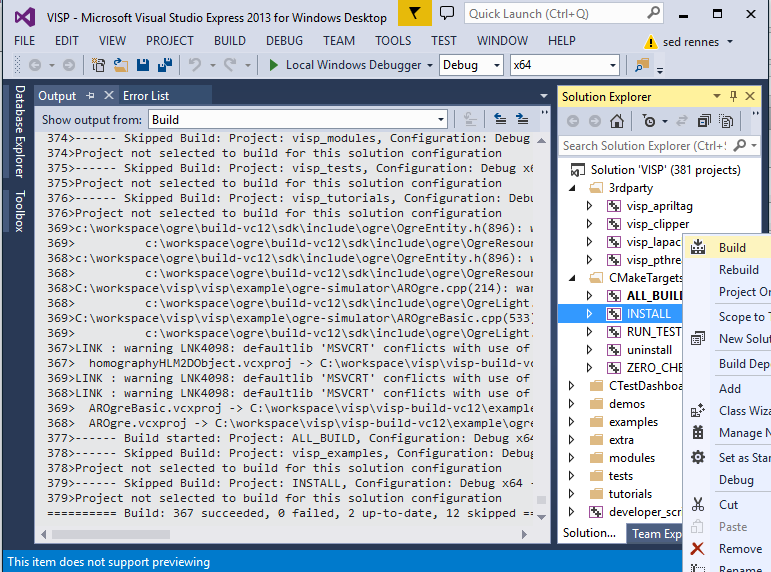
C:/workspace/visp/visp-build-vc12 folder you have the Visual Studio VISP.sln generated solution file.C:/workspace/visp/visp-build-vc12/VISP.sln solution file. This action will open ViSP project in Visual Studio C++. As shown in the next image, by default, Visual Studio position the solution configuration to Debug. 
C:/workspace/visp/visp-build-vc12/install folder; headers and libraries in include and x64/vc14 subfolders respectively.Debug configuration.Release settings. As shown in the next image, select the Release configuration. 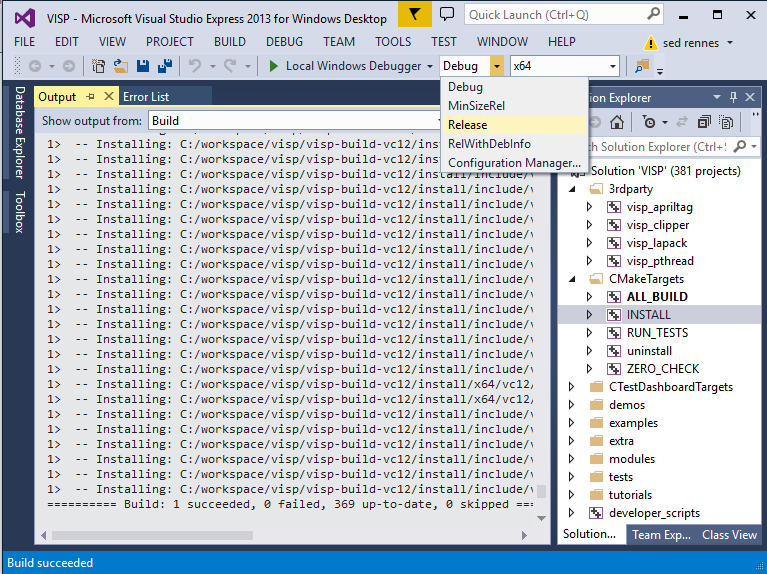
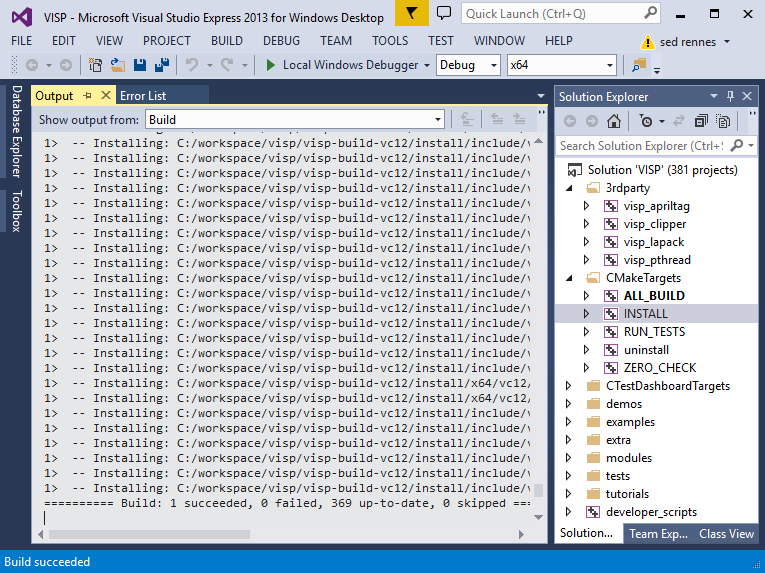
C:/workspace/visp/visp-build-vc12/install/x64/vc12/bin folder you have two versions of ViSP DLL libraries corresponding to ViSP modules; the one suffixed by "d" with debug information, the other one optimized with release compiler options. 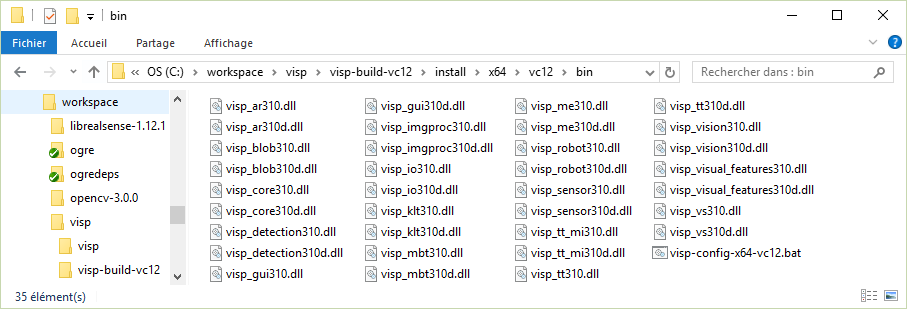
If you built static libraries then you are done. Otherwise, if you follow this tutorial step by step you need to add the bin folders path to the systems path. This is because you will use ViSP and OpenCV libraries in form of "Dynamic-link libraries" (also known as DLL). Inside these are stored all the algorithms and information the libraries contains. The operating system will load them only on demand, during runtime. However, to do this he needs to know where they are. The systems PATH variable contains a list of folders where DLLs can be found. Add ViSP and OpenCV libraries path to this and the OS will know where to look if he ever needs the libraries. Otherwise, you will need to copy the used DLLs right beside the applications executable file (exe) for the OS to find it.
To modify the PATH var and add the path to ViSP library, open a cmd terminal and run:
Then to add the path to OpenCV 3rd party libraries location, close and re-open a cmd-terminal and run:
Then to add the path to librealsense 3rd party library location, close and re-open a cmd-terminal and run:
If installed, you have also to add the location of Ogre 3rd party libraries to the path. Close and re-open a cmd terminal to run:
Then close and re-open a cmd terminal to check if the PATH var was well positioned.
Some ViSP examples and tests require data (images, video, models) that are not part of ViSP source code but available in a separate archive named visp-images-x.y.z.zip. This archive could be downloaded from https://visp.inria.fr/download page. We provide here after the way to install these data if you want to run ViSP examples.
Download visp-images-3.1.0.zip from https://visp.inria.fr/download and uncompress it in your workspace C:/workspace.
ViSP examples and tests are able to detect automatically the location of the requested data if you position an environment variable called VISP_INPUT_IMAGE_PATH. In our case, this variable should be set to C:\workspace\visp-images-3.1.0.
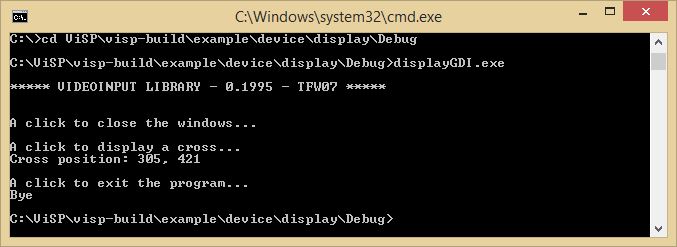
From now, you can try to run ViSP examples and tests. For example, if you want to run C:/worspace/visp/visp-build-vc12/example/device/display/Debug/displayGDI.exe, open a command window, enter in the right folder, and run:
During ogredeps build as described in Ogre3D 3rd party installation you may get in Visual C++ the following error when building SDL2 project:
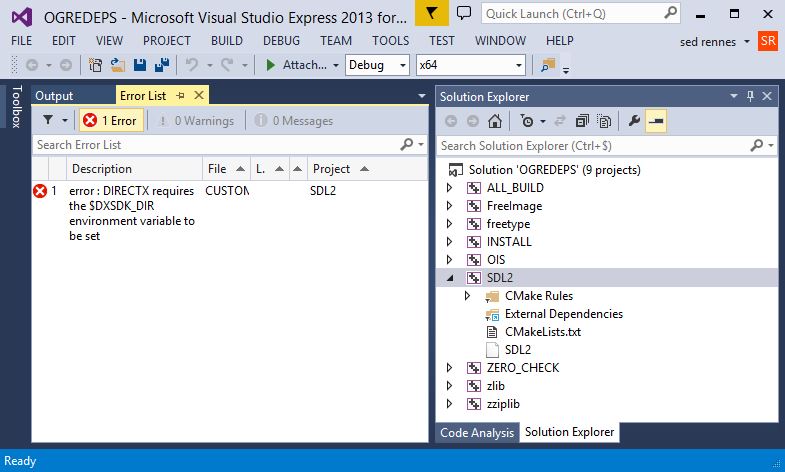
To fix the issue:
OGREDEPS_BUILD_SDL2 option off 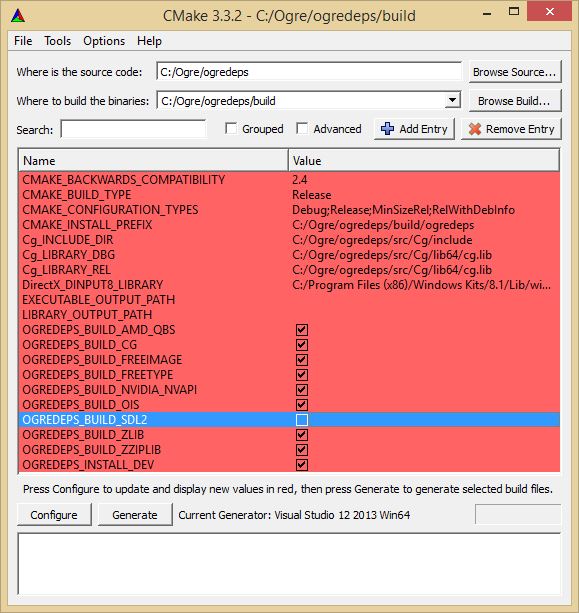
C:\Ogre\ogredeps\build\OGREDEPS.sln solution file with Visual C++ and try a new build as described in Ogre3D 3rd partyIf you run mbtEdgeTracking.exe, mbtKltTracking.exe or mbtEdgeKltTracking.exe enabling Ogre visibility check (using "-o" option), you may encounter the following issue:
and then a wonderful runtime issue as in the next image:
It means maybe that Ogre version is not compatible with DirectX 11. This can be checked adding "-w" option to the command line:
Now the binary should open the Ogre configuration window where you have to select "OpenGL Rendering Subsystem" instead of "Direct3D11 Rendering Subsystem". Press then OK to continue and start the tracking of the cube.
You are now ready to see the next Tutorial: How to create and build a CMake project that uses ViSP on Unix or Windows that will show you how to use ViSP as a 3rd party to build your own project.
 1.8.13