Visual Servoing Platform  version 3.1.0
Tutorial: Installation from source for Linux Ubuntu

In this tutorial you will learn how to install ViSP from source on Linux Ubuntu. These steps have been tested with Ubuntu 17.04 (64 bit) distribution, but should work with any other distribution as well.

Note
Concerning ViSP installation, we provide also other Tutorials.

Install prerequisities

Prior to build and install ViSP from source, you may install GNU g++ compiler and CMake.

  • gcc 4.4.x or later. This can be installed with:
    $ sudo apt-get install build-essential
  • CMake 2.8.12.2 or higher that could be installed with:
    $ sudo apt-get install cmake-curses-gui

Install 3rd parties

ViSP is interfaced with several optional 3rd party libraries. The complete list is provided here.

Recommended 3rd parties

We recommend to install the following:

  • OpenCV
    $ sudo apt-get install libopencv-dev
  • libX11 to be able to open a window to display images
    $ sudo apt-get install libx11-dev
  • lapack and eigen to benefit from optimized mathematical capabilities
    $ sudo apt-get install liblapack-dev libeigen3-dev
  • libdc1394 to grab images from firewire cameras
    $ sudo apt-get install libdc1394-22-dev
  • libv4l to grab images from usb or analogic cameras
    $ sudo apt-get install libv4l-dev
  • libxml2 to be able to configure the model-based trackers from xml files
    $ sudo apt-get install libxml2-dev
  • QR code detection
    $ sudo apt-get install libzbar-dev
  • pthread library
    $ sudo apt-get install libpthread-stubs0-dev

Other optional 3rd parties

We give also the way to install other 3rd party libraries to enable specific capabilities.

  • If you have an Intel Realsense RGB-D camera (R200, F200, SR300, LR200, RZ300) you may install librealsense 1.12.1 following these installation instructions. Additionnally you may also install PCL library using:
    $ sudo apt-get install libpcl-dev
  • If you have a Point Grey camera you may donwload and install Flycapture SDK following these instructions.
  • If you have a Basler camera you may donwload and install Pylon SDK following these instructions.
  • Coin, to be able to support vrml cad model used by the model-based trackers
    $ sudo apt-get install libcoin80-dev
  • libjpeg and libpng to support jpeg and png images respectively (only useful if OpenCV is not installed)
    $ sudo apt-get install libjpeg-dev libpng-dev
  • Ogre 3D if you want to do augmented reality or simulation
    $ sudo apt-get install libogre-1.9-dev libois-dev
  • Datamatrix code detection
    $ sudo apt-get install libdmtx-dev

Install ViSP from source code

Create a workspace

  • First create a workspace in $HOME/visp-ws that will contain ViSP source, build and dataset.
    $ export VISP_WS=$HOME/visp-ws
    $ mkdir -p $VISP_WS

Getting ViSP source code

There are different ways to get ViSP source code:

  • You can download the latest release as a zip or a tarball. Once downloaded, uncompress the file using either
    $ tar xvzf visp-x.y.z.tar.gz -C $VISP_WS
    or
    $ unzip visp-x.y.z.zip -d $VISP_WS
  • You can also download a daily snapshot. Once downloaded, uncompress the file using
    $ tar xvzf visp-snapshot-yyyy-mm-dd.tar.gz -C $VISP_WS
  • Or you get the cutting-edge ViSP from GitHub repository using the following command
    $ cd $VISP_WS
    $ git clone https://github.com/lagadic/visp.git

We suppose now that ViSP source is in the directory $VISP_WS/visp. The following should be adapted if you downloaded ViSP from a zip or tarball. In that case, the source is rather in something like $VISP_WS/visp-x.y.z.

Configuring ViSP from source

  • In the worspace, create first a directory named visp-build that will contain all the build material; generated Makefiles, object files, output libraries and binaries.
    $ mkdir $VISP_WS/visp-build
  • Enter the visp-build folder and configure the build:
    $ cd $VISP_WS/visp-build
    $ cmake ../visp
    A more versatile way to configure the build is to use ccmake, the CMake GUI:
    $ ccmake ../visp
    The following image shows that this command allows to configure (just by pressing [c] key) the build in a more advanced way where some options could be easily turned ON/OFF. It allows also to see which are the 3rd parties that will be used. To generate the makefiles, just press [g] key in the ccmake gui.
    img-ccmake-ubuntu-all.jpeg
    Snapshot of the ccmake ../visp command used to configure ViSP.

Building ViSP libraries

  • To build ViSP libraries proceed with:
    $ cd $VISP_WS/visp-build
    $ make -j4
Note
Installing ViSP is optional, since ViSP could be used as a 3rd party without installation. To proceed with the installation run:
$ cd $VISP_WS/visp-build
$ sudo make install
The default install location is set to 
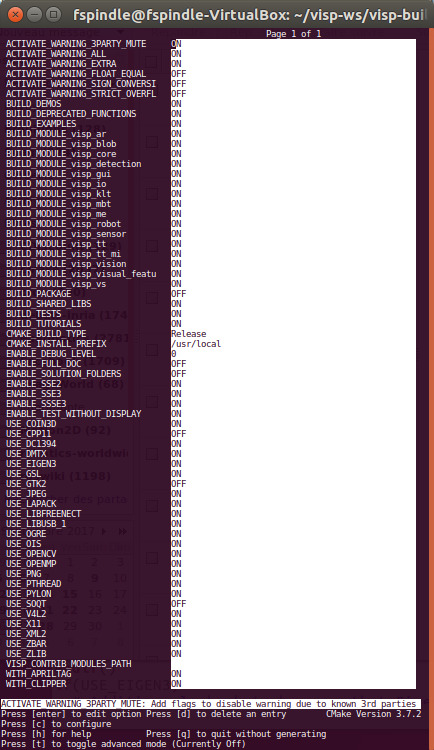
/usr/local. This location could be changed modifying CMAKE_INSTALL_PREFIX var:
$ cd $VISP_WS/visp-build
$ cmake ../visp -DCMAKE_INSTALL_PREFIX=/usr
$ sudo make install

Building ViSP documentation

  • To build ViSP documentation, you have first to install Doxygen package:
    $ sudo apt-get install doxygen graphviz texlive-latex-base
    Then you can proceed with:
    $ cd $VISP_WS/visp-build
    $ cmake ../visp
    $ make -j4 visp_doc
    The generated documentation is then available in $VISP_WS/visp-build/doc/html/index.html
  • It is also possible to generate a more complete documentation that includes also all the internal classes. This could be achieved setting CMake var ENABLE_FULL_DOC to ON like:
    $ cmake ../visp -DENABLE_FULL_DOC=ON
    $ make -j4 visp_doc

Install ViSP dataset

  • Some ViSP examples and tests require data (images, video, models) that are not part of ViSP source code but available in a separate archive named ViSP-images-x.y.z.zip. This archive could be downloaded from http://visp.inria.fr/download page. We provide here after the way to install these data if you want to run ViSP examples.
    $ unzip ViSP-images-3.1.0.zip -d $VISP_WS
  • We suppose now that the data are located in $VISP_WS/ViSP-images-3.1.0.
    $ ls $VISP_WS/ViSP-images-3.1.0
    AprilTag circle ellipse iv LICENSE.txt mbt mire-2 video
    calibration cube ellipse-1 Klimt line mire README.md
  • Set VISP_INPUT_IMAGE_PATH environment variable to help ViSP examples and tests to find the location of the data set. It is more convenient if this environment variables is automatically added to your bash session every time a new shell is launched:
    $ echo "export VISP_WS=$HOME/visp-ws" >> ~/.bashrc
    $ echo "export VISP_INPUT_IMAGE_PATH=$VISP_WS/ViSP-images-3.1.0" >> ~/.bashrc
    $ source ~/.bashrc
  • From now, you can try to run ViSP examples and tests. For example you can run displayX example that should open a windows with Klimt painting image and some overlay drawings:
    $ cd $VISP_WS/visp-build
    $ ./example/device/display/displayX
    A click to close the windows...
    A click to display a cross...
    Cross position: 201, 441
    A click to exit the program...
    Bye

Tips and tricks

How to uninstall ViSP

  • After ViSP installation, you can remove installed material using:
    $ cd $VISP_WS/visp-build
    $ sudo make uninstall

How to build only ViSP libraries

  • If you want to build only ViSP modules libraries, nor the examples, tutorials and tests:
    $ cd $VISP_WS/visp-build
    $ make -j4 visp_modules

How to build a ViSP specific module

  • If you want to build a given module and all the dependencies:
    $ cd $VISP_WS/visp-build
    $ make -j4 visp_<module_name>
    For example to build the model-based tracker module named mbt, run:
    $ cd $VISP_WS/visp-build
    $ make -j4 visp_mbt

Which are the targets that could be run with make ?

  • To know which are the target available with make:
    $ make help | grep visp
    ... visp_tests
    ... visp_modules
    ... visp_examples
    ... visp_demos
    ... visp_tutorials
    ... visp_clipper
    ... visp_apriltag
    ... visp_core
    ... visp_gui
    ... visp_io
    ... visp_klt
    ... visp_me
    ... visp_sensor
    ... visp_ar
    ... visp_blob
    ... visp_robot
    ... visp_visual_features
    ... visp_vs
    ... visp_vision
    ... visp_detection
    ... visp_mbt
    ... visp_tt
    ... visp_tt_mi

Which are the 3rd party libraries that are used in ViSP ?

  • To see which are the optional 3rd parties that are found during the configuration stage and that will be used by ViSP during the build you can have a look to the text file named ViSP-third-party.txt and located in $VISP_WS/visp-build. We provide hereafter an example of a possible content of this file that contains also build info.
    $ cat $VISP_WS/visp-build/ViSP-third-party.txt
    ==========================================================
    General configuration information for ViSP 3.1.0
    Version control: 3.0.1-340-gae7e5f10c
    Platform:
    Timestamp: 2017-09-26T15:06:26Z
    Host: Linux 4.10.0-26-generic x86_64
    CMake: 3.7.2
    CMake generator: Unix Makefiles
    CMake build tool: /usr/bin/make
    Configuration: Release
    C/C++:
    Built as dynamic libs?: yes
    C++ Compiler: /usr/bin/c++ (ver 6.3.0)
    C++ flags (Release): -Wall -Wextra -fopenmp -fvisibility=hidden -msse2 -msse3 -mssse3 -fPIC -O3 -DNDEBUG
    C++ flags (Debug): -Wall -Wextra -fopenmp -fvisibility=hidden -msse2 -msse3 -mssse3 -fPIC -g
    C Compiler: /usr/bin/cc
    C flags (Release): -Wall -Wextra -fopenmp -fvisibility=hidden -msse2 -msse3 -mssse3 -fPIC -O3 -DNDEBUG
    C flags (Debug): -Wall -Wextra -fopenmp -fvisibility=hidden -msse2 -msse3 -mssse3 -fPIC -g
    Linker flags (Release):
    Linker flags (Debug):
    ViSP modules:
    To be built: core gui io klt me sensor ar blob robot visual_features vs vision detection mbt tt tt_mi
    Disabled: -
    Disabled by dependency: -
    Unavailable: -
    Build options:
    Build deprecated: yes
    Build with moment combine: no
    Mathematics:
    Use Lapack/blas: yes (ver 3.7.0)
    Use Lapack (built-in): no
    Use Eigen3: yes (ver 3.3.2)
    Use OpenCV: yes (ver 2.4.9.1)
    Use GSL: yes (ver 2.3)
    Simulator:
    Ogre simulator:
    \- Use Ogre3D: yes (ver 1.9.0)
    \- Use OIS: yes (ver 1.3.0)
    Coin simulator:
    \- Use Coin3D: yes (ver 4.0.0)
    \- Use SoWin: no
    \- Use SoXt: no
    \- Use SoQt: no
    \- Use Qt4: no
    \- Use Qt3: no
    Media I/O:
    Use JPEG: yes (ver 80)
    Use PNG: yes (ver 1.6.28)
    \- Use ZLIB: yes (ver 1.2.11)
    Use OpenCV: yes (ver 2.4.9.1)
    Real robots:
    Use Afma4: no
    Use Afma6: no
    Use Viper650: no
    Use Viper850: no
    Use aria (Pioneer): no
    Use PTU46: no
    Use Biclops PT: no
    GUI:
    Use X11: yes
    Use GTK: no
    Use OpenCV: yes (ver 2.4.9.1)
    Use GDI: no
    Use Direct3D: no
    Cameras:
    Use DC1394-2.x: yes (ver 2.2.5)
    Use CMU 1394: no
    Use V4L2: yes (ver 1.12.3)
    Use directshow: no
    Use OpenCV: yes (ver 2.4.9.1)
    Use Flycapture: no
    Use Pylon: yes (ver 5.0.9.10389)
    RGB-D sensors:
    Use Realsense: no
    \- Use PCL: no
    \- Use VTK: no
    Use Kinect: yes
    \- Use libfreenect: yes (ver 0.5)
    \- Use libusb-1: yes (ver 0.1.12)
    \- Use pthread: yes
    F/T sensors:
    Use atidaq (built-in): no
    Use comedi: no
    Detection:
    Use zbar: yes (ver 0.10)
    Use dmtx: yes (ver 0.7.4)
    Use AprilTag (built-in): yes (ver 0.9.8)
    Misc:
    Use Clipper (built-in): yes (ver 6.4.2)
    Use XML2: yes (ver 2.9.4)
    Optimization:
    Use OpenMP: yes
    Use pthread: yes
    Use pthread (built-in): no
    Use cxx11: no
    Documentation:
    Use doxygen: no
    Tests and samples:
    Tests: yes
    Demos: yes
    Examples: yes
    Tutorials: yes
    Install path: /usr/local
    ==========================================================

Next tutorial

You are now ready to see the next Tutorial: How to create and build a CMake project that uses ViSP on Unix or Windows that will show you how to use ViSP as a 3rd party to build your own project.