In this tutorial you will learn how to install ViSP from source on Windows 8.1 with Visual C++. These steps have been tested on Windows 8.1 (64 bit), with CMake 3.1.1 and Visual Studio Express 2013 but should work with any other version as well.
- Note
- Concerning ViSP installation, we provide also other Tutorials.
Required packages
Getting ViSP source code
There are different ways to get ViSP source code.
Getting the latest release
You can download the latest stable release as a zip.
Getting the latest snapshot
When significant changes or bug fixes were introduced in the current developpement version of the source code, we provide snapshots.
If available, you can download a recent snapshot following the link.
Getting the source from Subversion
You can also get the cutting-edge ViSP version from Subversion repository svn://scm.gforge.inria.fr/svn/visp/trunk/ViSP.
One way to do that under Windows is to install Subversion that comes with Cygwin installer that is available on https://cygwin.com/install.html
- From the previous link, download Cygwin installer for 32-bits or 64-bits version.
- Double click on the setup binary to start installation. Keep the default settings and select a mirror.
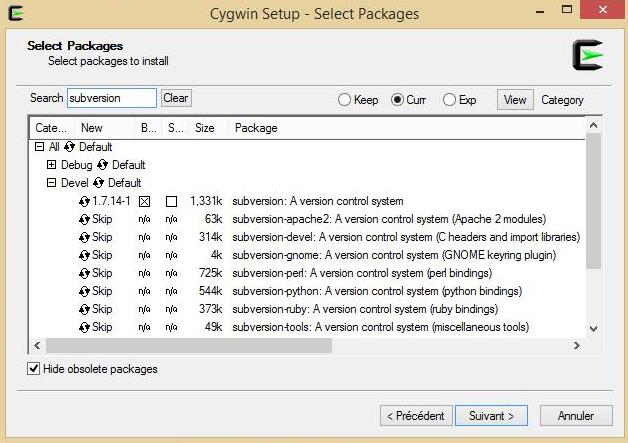
- As shown in the next image, in the window that allows to select the packages, search for "subversion" and select "subversion" package in "Devel":
- Click on Next button twice to start installation, and then on Finish button to exit installer.
- Now you should be able to use subversion
C:\Users\...> C:\cygwin64\bin\svn.exe --version
svn, version 1.7.14
Once installed, to get ViSP source code run:
C:\Users\...> cd C:\ViSP
C:\Users\...> C:\cygwin64\bin\svn.exe checkout svn:
Configuring ViSP from source
We suppose now that ViSP source is in a directory denoted <source_dir>, for example C:\ViSP\ViSP-2.10.0
The goal of the configuration step is now to use CMake to produce a Visual Studio C++ solution that will be located in <binary_dir>, for example C:\ViSP\ViSP-2.10.0-build.
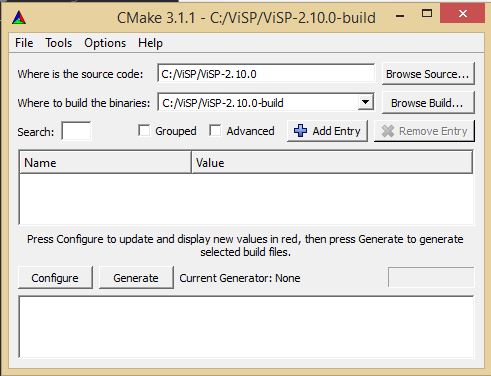
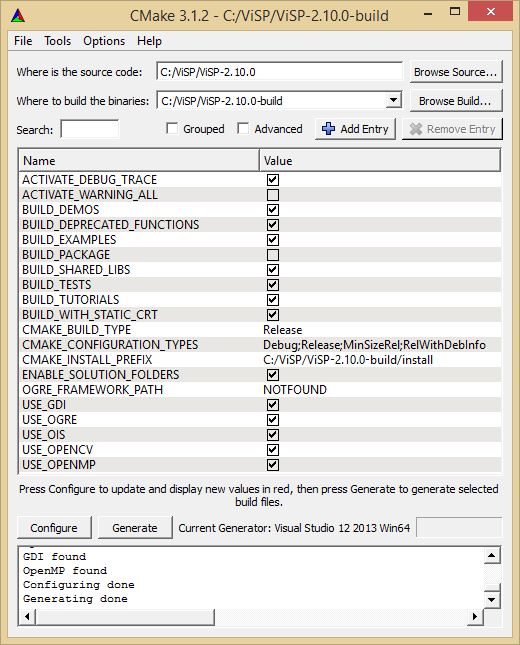
- Launch CMake (cmake-gui) and complete the <source_dir> and <binary_dir> locations as in the next image.
- Click then on "Configure" button.
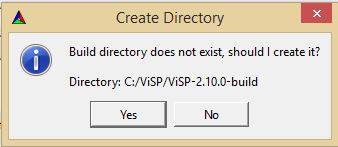
- Click on "Yes" to create the
C:\ViSP\ViSP-2.10.0-build folder.
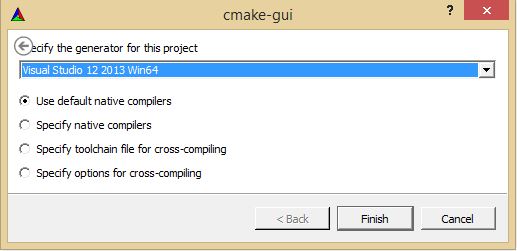
- Select then your compiler, for example here Visual Studio Express 2013 Win64, and click on "Finish" button.
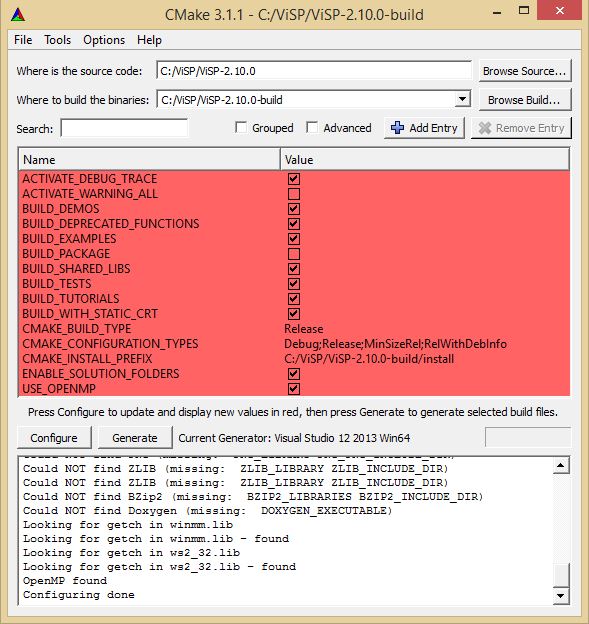
- This will start CMake configuration. As shown in the next image, only OpenMP 3rd party is automatically detected.
- As given in the previous image, note also that the installation folder is set to
C:\ViSP\ViSP-2.10.0-build\install. - Warning
- If you want to change the installation forder to
C:/Program Files
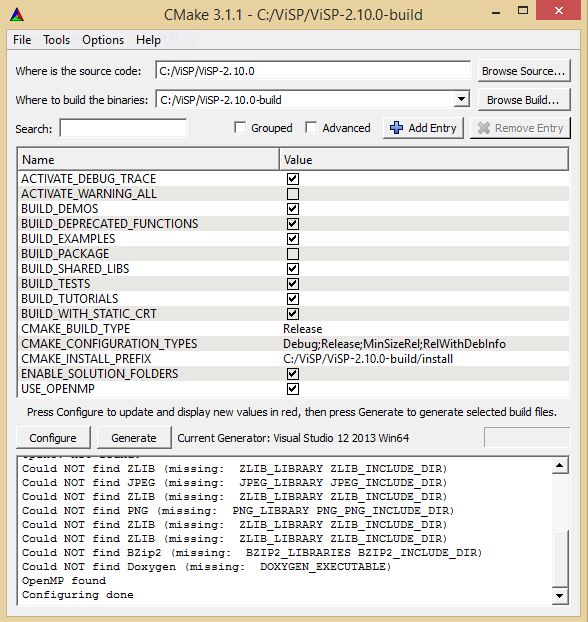
- Click then on "Configure" button. All the red lines should disappear.
- Note
- The default configuration lead to the creation of a shared library (with
BUILD_SHARED_LIBS option to disable DLL creation.
Optional 3rd party packages
ViSP is interfaced with some 3rd party libraries. The complete list is provided here.
Windows Software Development Kit
- We recommend to install the "Windows Software Development Kit (SDK) for windows 8.1" to get the Graphical Device Interface (GDI) capabilities. The GDI is used in ViSP to display images in a window thanks to vpDisplayGDI class. This SDK can be downloaded from https://msdn.microsoft.com/en-us/windows/desktop/bg162891.aspx
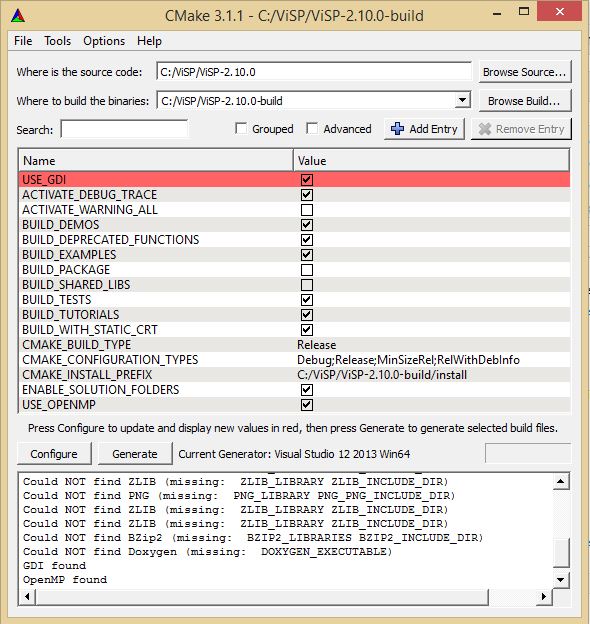
- Once installed, return to CMake Gui and click on "Configure" button. As shown in the the next image, GDI should be detected.
- Click again on "Configure" button.
OpenCV 3rd party
- We recommend to install OpenCV. From http://opencv.org/downloads.html download the latest OpenCV for Windows version. There is an OpenCV tutorial: Installation Using the Pre-build Libraries that may help. In our case we install
OpenCV-2.4.10.exe pre-build SDK in C:\OpenCV. The installer opencv-2.4.10.exe copied all the material in C:\OpenCV\opencv.
- Now in order that ViSP detects OpenCV you have to set
OpenCV_DIR environment variable. Start up a command window (in your "Start" menu click on "Run" and type in cmd.exe) and enter: setx OpenCV_DIR C:\OpenCV\opencv\build
- Here the directory is where you have the build directory (extracted or built). Inside this folder you should have a file named
OpenCVConfig.cmake.
- Quit and restart CMake (cmake gui). It is important to quit CMake in order to take into account the new
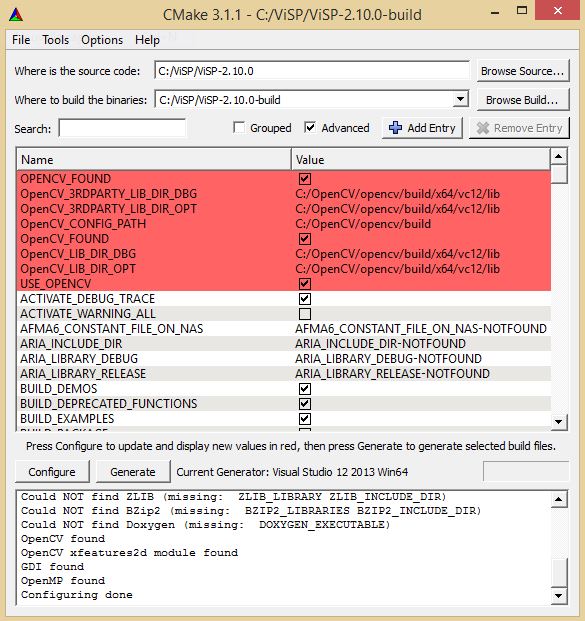
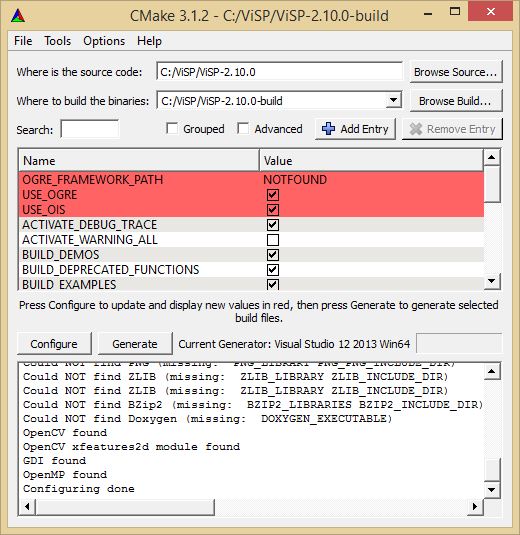
OpenCV_DIR environment variable. Click "Configure" button. As shown in the next image, a new red line indicating that OpenCV is found should appear.

- As shown in the next image, if you enable the advanced view, you can see that we will use OpenCV libraries located in
C:/OpenCV/opencv/build/x64/vc12/lib folder.
- Press "Configure" button again.
Ogre3D 3rd party
If you are interested in augmented reality (see vpAROgre), or if you want to enable advanced visibility computation during model-based tracking (see vpMbTracker::setOgreVisibilityTest() and Tutorial: Model-based tracking) we recommend to install Ogre3D. You can check if a prebuild SDK matches your Visual C++ version, and follow the SDK installation instructions. You can also install the lastest release from source. Based on our experience, this is what we recommend.
Ogre source code is hosted on BitBucket. On Ogre wiki you will find useful information to build and install Ogre from source. Hereafter we give the main steps.
Ogre prerequisities
- To build Ogre on Windows you will need to install the DirectX SDK. Since Windows 8, DirectX is no longer a standalone package, rather it is bundled in the Windows 8.x SDK. The latest version is the Windows 8.1 SDK.
- To get the Ogre source code but also the source code of all the dependencies hosted on BitBucket and available with Mercurial, you have to install TortoiseHg.
Getting Ogre dependencies
- A repository containing Ogre dependencies source code is available here at BitBucket.
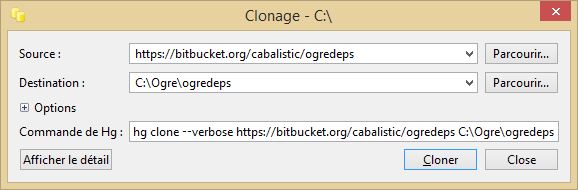
- Open an explorer window, and enter in TortoiseHg Clone menu. Select as source https://bitbucket.org/cabalistic/ogredeps and as destination C:\Ogre\ogredeps as in the next image:
- Click on Clone button to get dependencies source code in C:\Ogre\ogredeps
Building Ogre dependencies
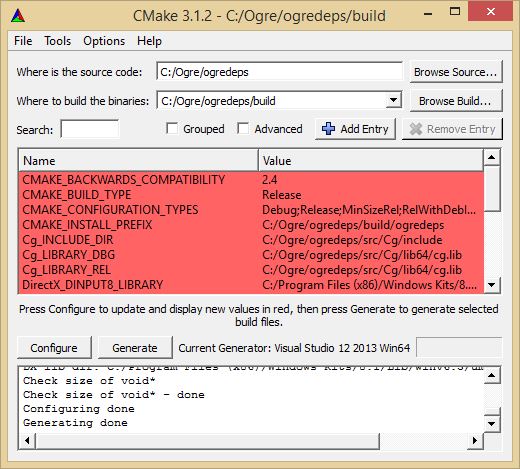
- To build the dependencies, open CMake GUI and set source code location pointing to C:\Ogre\ogredeps and build location pointing to C:\Ogre\ogredeps\build. Select Visual Studio 12 2013 Win64 as generator, click on "Configure" button and then on "Generate" button. You should have something similar to the next image:
- Open C:\Ogre\ogredeps\build\OGREDEPS.sln solution file with Visual C++.
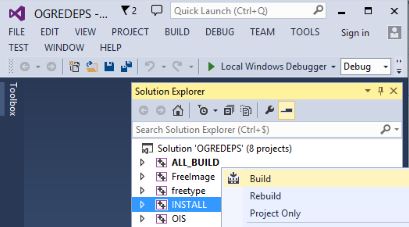
- In Visual, select Debug configuration and build INSTALL project:
- In Visual, select also Release configuration and build again INSTALL project.
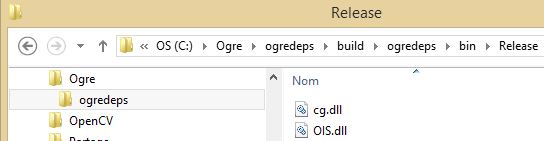
- Now in C:\Ogre\ogredeps\build\ogredeps\bin you will find the Cg and OIS dependencies build in Debug and Release:
- To finish dependencies installation, set OGRE_DEPENDENCIES_DIR environment variable pointing to C:\Ogre\ogredeps\build\ogredeps
setx OGRE_DEPENDENCIES_DIR C:\Ogre\ogredeps\build\ogredeps
Getting Ogre source
- From Ogre download page, identify the last release. In our case Ogre 1.9 that is on BitBucket repository under branch v1-9.
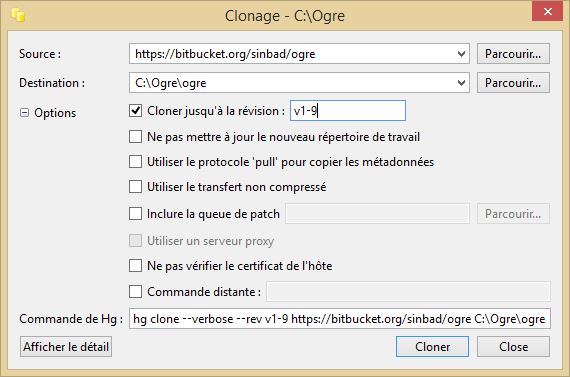
- Open an explorer window, and enter in TortoiseHg Clone menu. Select as source https://bitbucket.org/sinbad/ogre, as destination C:\Ogre\ogre and select revision v1-9 corresponding to the branch of the latest release as presented in the next image:
- Click on Clone button to get Ogre source code in C:\Ogre\ogre
Building Ogre source
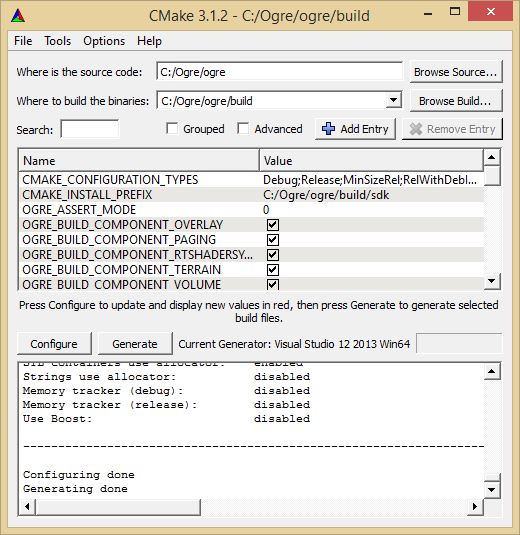
- Close and re-open CMake Gui. Set source code location pointing to C:\Ogre\ogre and build location pointing to C:\Ogre\ogre\build. Select Visual Studio 12 2013 Win64 as generator, click on "Configure" button and then on "Generate" button. You should have something similar to the next image:
- Note
- As shown in the previous image, Ogre installation folder is set to C:\Ogre\ogre\build\sdk.
- Open C:\Ogre\ogre\build\OGRE.sln solution file with Visual C++.
- In Visual, select Debug configuration and build INSTALL project.
- In Visual, select also Release configuration and build again INSTALL project.
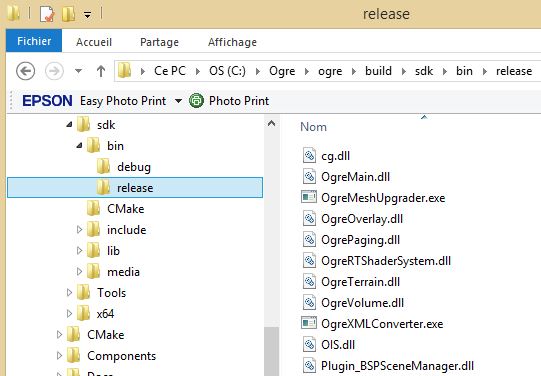
- Now in C:\Ogre\ogre\build\sdk\bin you will find all the libraries in Debug and Release configuration, including Cg and OIS dependencies there where build previously.
- To finish Ogre installation set OGRE_HOME environment variables to C:\Ogre\ogre\build\sdk location.
setx OGRE_HOME C:\Ogre\ogre\build\sdk
Configuring ViSP with Ogre
- Now quit and restart CMake to take into account the environment variables changes. Select C:\ViSP\ViSP-2.10.0-build as build libraries location to come back to ViSP configuration. Click on "Configure" button. Ogre should be detected.
- Press "Configure" button again.
Ending the configuration
- To finish the configuration, click on "Generate" button.
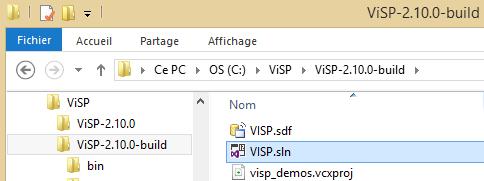
- Once the generation is done, in
C:/ViSP/ViSP-2.10.0-build folder you have the Visual Studio VISP.sln generated solution file.
Building ViSP from source
- To build ViSP just double click on
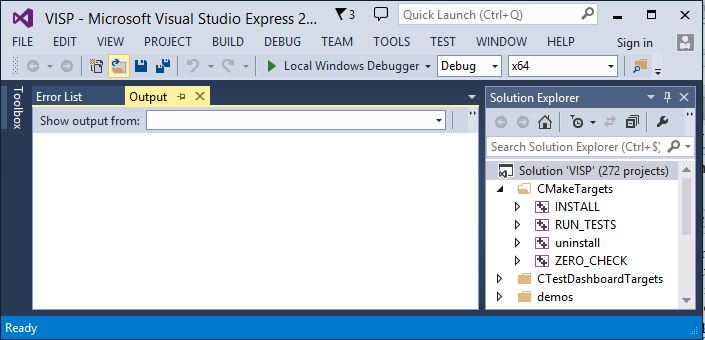
C:/ViSP/ViSP-2.10.0-build/VISP.sln solution file. This action will open ViSP project in Visual Studio C++. As shown in the next image, by default, Visual Studio position the solution configuration to Debug.
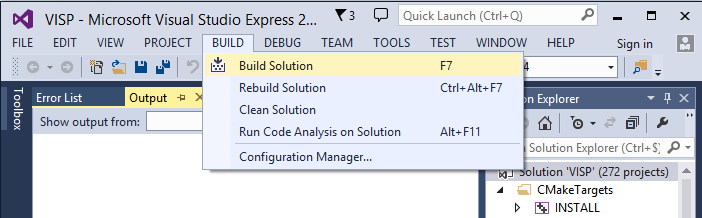
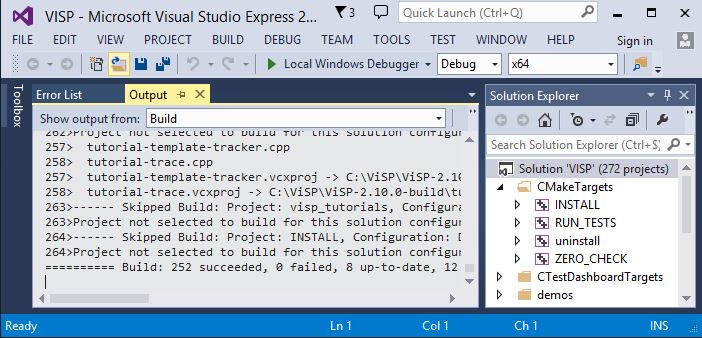
- Enter menu "BUILD/Build Solution" to build ViSP.
- At the end of the build process you should have the following indicating that all the build succeeded.
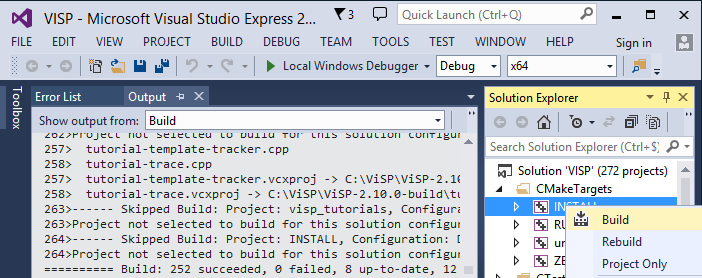
- Now to install ViSP, build "INSTALL" project. To this end, apply a left click on "INSTALL" to select the project, then a right click to enter in the "Build" menu.
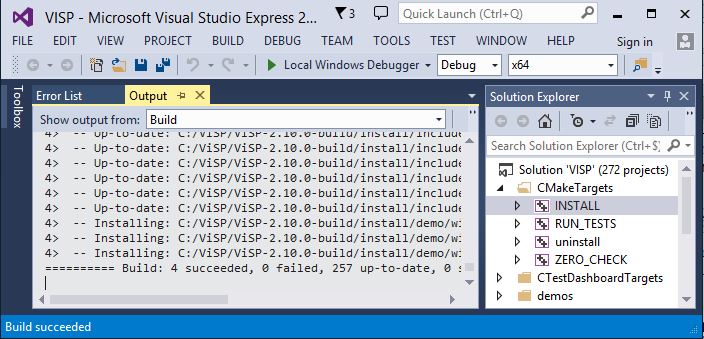
- At the end of the installation, you should have the following.
- As shown in the previous image, all the headers but also the generated library are copied in
C:/ViSP/ViSP-2.10.0-build/install folder.
- This ends ViSP installation with
Debug configuration.
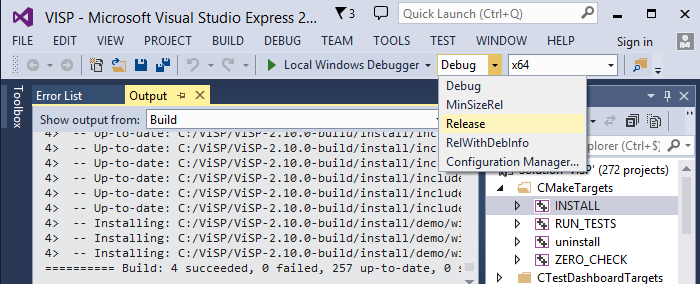
- We recommend now to do the same with
Release settings. As shown in the next image, select the Release configuration.
- Now, as previously, build and install ViSP again.
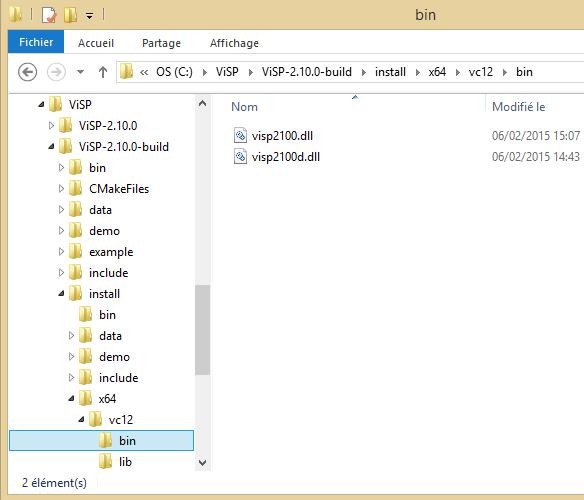
- At the end, in
C:/ViSP/ViSP-2.10.0-build/install/x64/vc12/bin folder you have two versions of ViSP DLL library; the one suffixed by "d" with debug information, the other one optimized with release compiler options.
Setting up PATH variable
If you built static libraries then you are done. Otherwise, if you follow this tutorial step by step you need to add the bin folders path to the systems path. This is because you will use ViSP and OpenCV libraries in form of "Dynamic-link libraries" (also known as DLL). Inside these are stored all the algorithms and information the libraries contains. The operating system will load them only on demand, during runtime. However, to do this he needs to know where they are. The systems PATH variable contains a list of folders where DLLs can be found. Add ViSP and OpenCV libraries path to this and the OS will know where to look if he ever needs the libraries. Otherwise, you will need to copy the used DLLs right beside the applications executable file (exe) for the OS to find it.
To modify the PATH var and add the path to ViSP library, open a cmd terminal and run:
C:\Users\...> echo %PATH%
C:\Users\...> setx PATH "%PATH%;C:\ViSP\ViSP-2.10.0-build\install\x64\vc12\bin"
Then to add the path to OpenCV 3rd party libraries location, close and re-open a cmd-terminal and run:
C:\Users\...> echo %PATH%
C:\Users\...> setx PATH "%PATH%;C:\OpenCV\opencv\build\x64\vc12\bin"
If installed, you have also to add the location of Ogre 3rd party libraries to the path. Close and re-open a cmd terminal to run:
C:\Users\...> echo %PATH%
C:\Users\...> setx PATH "%PATH%;C:\Ogre\ogre\build\sdk\bin\release"
C:\Users\...> setx PATH "%PATH%;C:\Ogre\ogre\build\sdk\bin\debug"
Then close and re-open a cmd terminal to check if the PATH var was well positioned.
C:\Users\...> echo %PATH%
Appendix
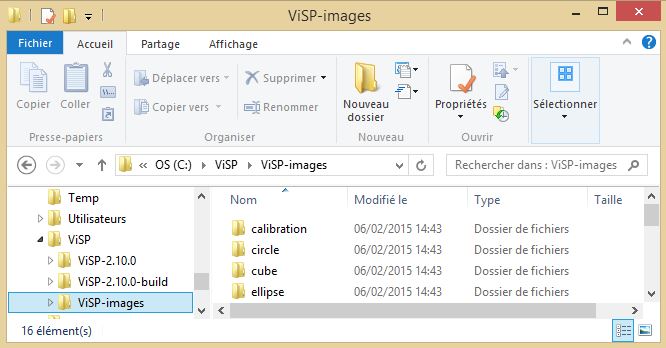
Installing testing data
Some ViSP examples and tests require data set (images, models). These data set is provided as a compressed zip files.
Using testing data
- ViSP examples and tests are able to detect automatically the location of the requested data if you position an environment variable called
VISP_INPUT_IMAGE_PATH. In our case, this variable should be set to C:\ViSP. setx VISP_INPUT_IMAGE_PATH C:\ViSP
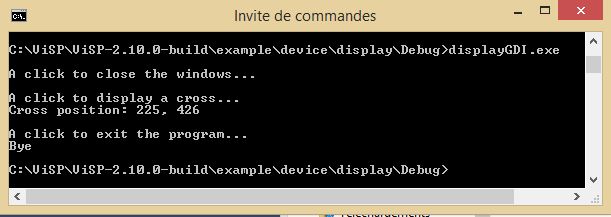
- It is also possible to run the examples and tests without positioning
VISP_INPUT_IMAGE_PATH by using command line option -i <path to the data set>. If you want to run <binary dir>/example/device/display/Debug/displayGDI.exe, open a command window, enter in the right folder, and run: displayGDI.exe -i C:\ViSP
You are now ready to see the next Tutorial: How to create and build a CMake project that uses ViSP on Unix or Windows that will show you how to use ViSP as a 3rd party to build your own project.
Known issues
AROgre example returns an exception
When running AROgre.exe example with "OpenGL Rendering Subsystem" you may encounter the following message:
C:\ViSP\ViSP-2.10.0-build\example\ogre-simulator\Debug> AROgre.exe -c
...
Unregistered ResourceManager for type Material
Catch an exception
Parse C:/ViSP/ViSP-2.10.0-build/example/ogre-simulator/Debug/Ogre.log file to check what goes wrong.
To have more information on what produces this exception, you can also edit C:/ViSP/ViSP-2.10.0/example/ogre-simulator/AROgre.cpp and modify the end of the file to catch Ogre exceptions like:
std::cout << "Catch a ViSP exception: " << e << std::endl;
return 1;
}
catch(Ogre::Exception e) {
std::cout << "Catch an Ogre exception: " << e.getDescription() << std::endl;
return 1;
}
catch(...) {
std::cout << "Catch an exception " << std::endl;
return 1;
}
Build AROgre and run again the binary. You should now see what goes wrong:
C:\ViSP\ViSP-2.10.0-build\example\ogre-simulator\Debug> AROgre.exe -c
...
Unregistered ResourceManager for type Material
Catch an Ogre exception: Cannot locate resource DualQuaternion_common.glsl in resource group General or any other group.
See AROgre example doesn't found DualQuaternion_common.glsl file to fix this issue.
AROgre example doesn't found DualQuaternion_common.glsl file
If you run AROgre and if it complains like:
C:\ViSP\ViSP-2.10.0-build\example\ogre-simulator\Debug> AROgre.exe -c
...
Unregistered ResourceManager for type Material
Catch an Ogre exception: Cannot locate resource DualQuaternion_common.glsl in resource group General or any other group.
A quick fix consists in modifying C:/ViSP/ViSP-2.10.0-build/data/ogre-simulator/resources.cfg file to add the path to DualQuaternion_common.glsl file. In our case this file is in C:/Ogre/ogre/build/sdk/Media/materials/programs/GLSL. Just edit resources.cfg file and add the following line:
[General]
...
FileSystem=C:/Ogre/ogre/build/sdk/Media/materials/programs/GLSL
- Note
- The modifications done in C:/ViSP/ViSP-2.10.0-build/data/ogre-simulator/resources.cfg will be erased when you run a new CMake configuration on ViSP project.
That is why, if the fix works, you have to introduce it permanently in ViSP source code by modifying C:/ViSP/ViSP-2.10.0/CMakeModules/resources.cfg.in adding a line:
[General]
...
FileSystem=@OGRE_MEDIA_DIR@/materials/programs/GLSL
Then build again AROgre or open CMake GUI on ViSP, configure and generate the solution.
Model-based trackers are not working with Ogre visibility ckeck
If you run mbEdgeTracker.exe, mbKltTracker.exe or mbEdgeKltTracker.exe enabling Ogre visibility check (using "-o" option), you may encounter the following issue:
C:\ViSP\ViSP-2.10.0-build\example\Tracking\Debug> mbEdgeTracker.exe -c -o
...
OGRE EXCEPTION(6:FileNotFoundException): Cannot locate resource VTFInstancing.cg in resource group General
...
Initializing OIS ***
and then a wonderful runtime issue as in the next image:
It means maybe that Ogre version is not compatible with DirectX 11. This can be checked modifying C:/ViSP/ViSP-1.10.0/src/tracking/mbt/vpMbHiddenFaces.h. Edit vpMbHiddenFaces.h and in the vpMbHiddenFaces::vpMbHiddenFaces() constructor pass true to vpAROgre::setShowConfigDialog() in order to open Ogre configuration window:
ogre->setShowConfigDialog(true);
Build and install again ViSP library. Now if you run again mbEdgeTracker.exe binary with "-o" option it should open the Ogre configuration window where you have to select "OpenGL Rendering Subsystem" instead of "Direct3D11 Rendering Subsystem". Press then OK to continue and start the tracking of the cube.
 1.8.9.1
